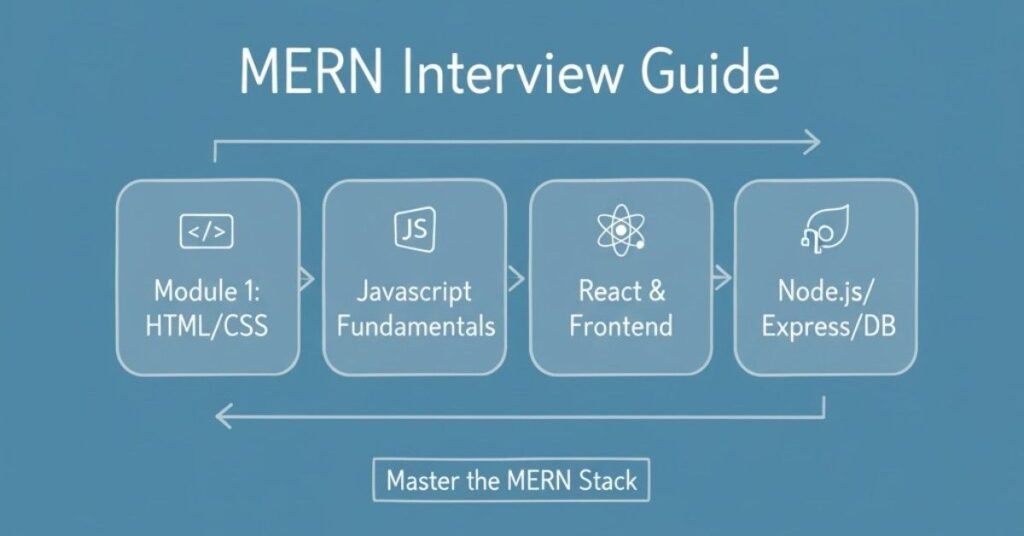
Mernstack Interview Preparation Guide
1. 200+ Technical Interview Questions & Answers

- HTML & CSS Fundamentals: 20 Questions
- JavaScript Core Concepts: 20 Questions
- React Development: 50 Questions
- Node.js and Backend Development: 25 Questions
- MongoDB and Database Management: 15 Questions
- Authentication and Security: 10 Questions
- Real-time Communication: 5 Questions
- Caching and Performance: 5 Questions
- Cloud and Deployment: 10 Questions
- Development Tools and Best Practices: 10 Questions
- Additional Technical Questions: 35 Questions
🔍 Explore All MERN Stack Resources →
Section 1: HTML & CSS Fundamentals
Basic HTML Concepts
Q1. What is HTML and why do we use it?
HTML stands for HyperText Markup Language. Think of it as the skeleton of any website you see on the internet. Just like how your body needs bones to give it structure, websites need HTML to create their basic structure. When you visit any website, the headings, paragraphs, images, and links you see are all created using HTML. It tells the browser what content to display and how to organize it on the page.
Q2. Explain the difference between HTML elements and HTML tags.
Tags are the actual code you write with angle brackets, like `<p>` and `</p>`. An element is the complete package – it includes the opening tag, the content inside, and the closing tag. For example, `<p>This is a paragraph</p>` is a complete element, while `<p>` and `</p>` are just tags. Think of tags as the wrapping paper and the element as the complete wrapped gift.
Q3. What are semantic HTML elements and why should we use them?
Semantic HTML elements are tags that clearly describe their meaning to both the browser and the developer. Instead of using generic `<div>` tags everywhere, we use meaningful tags like `<header>`, `<nav>`, `<article>`, `<section>`, and `<footer>`. These elements make your code easier to read and understand. They also help search engines understand your content better, which improves SEO. Plus, they make your website more accessible for people using screen readers.
Q4. What is the purpose of the DOCTYPE declaration?
The DOCTYPE declaration is like an instruction manual for your browser. It tells the browser which version of HTML you’re using so it knows how to read and display your page correctly. In modern HTML5, we simply write <!DOCTYPE html> at the very top of our HTML file. Without it, browsers might display your page in “quirks mode,” which can cause unexpected layout problems.
Q5. Explain the difference between <div> and <span> elements.
A `<div>` is a block-level element, meaning it takes up the full width available and always starts on a new line. It’s like taking a full row in a parking lot. A `<span>` is an inline element that only takes up as much width as it needs and doesn’t force a line break. It’s like parking a motorcycle – it only uses the space it needs. You use `<div>` for larger sections of content and `<span>` for small pieces of text within a line.
Q6. What are HTML5 form validation attributes?
HTML5 brought us built-in validation attributes that check user input without needing JavaScript. The required attribute ensures a field isn’t left empty. The pattern attribute lets you specify a regular expression the input must match. The min and max attributes set limits for numbers and dates. The type attribute itself provides validation – for example, type=”email” automatically checks if the input looks like a valid email address. These features make forms smarter and save you from writing extra validation code.
Q7. What is the purpose of the alt attribute in image tags?
The alt attribute provides alternative text that describes an image. If the image fails to load due to a slow connection or broken link, users will see this text instead of a broken image icon. More importantly, screen readers use this text to describe images to visually impaired users, making your website accessible. Search engines also read alt text to understand what your images are about, which helps with SEO. Always write descriptive alt text that conveys the meaning of the image.
Q8. Explain the difference between inline and block elements.
Block elements are like building blocks stacked on top of each other – they take the full width available and always start on a new line. Examples include `<div>`, `<h1>`, `<p>`, and `<section>`. Inline elements flow within the text like words in a sentence – they only take up the space they need and don’t create line breaks. Examples include `<span>`, `<a>`, `<strong>`, and `<img>`. You can change this behavior using CSS display properties, but understanding the default behavior helps you structure your HTML properly.
Q9. What are data attributes in HTML5?
Data attributes let you store custom information directly in your HTML elements without affecting how they look or behave. They always start with data- followed by your custom name, like data-user-id=”123″ or data-color=”blue”. You can access these values easily with JavaScript using element.dataset.userId. They’re perfect for storing information you’ll need later in your JavaScript code, like IDs, categories, or settings, without cluttering your HTML with extra attributes.
Q10. What is the purpose of meta tags in HTML?
Meta tags provide information about your webpage to browsers and search engines. They live in the <head> section and don’t display on the page itself. The charset meta tag tells browsers which character encoding to use. The viewport meta tag controls how your page looks on mobile devices. Description and keywords meta tags help search engines understand your content. Open Graph meta tags control how your page looks when shared on social media. Think of meta tags as invisible labels that help browsers and search engines handle your page correctly.
CSS Styling and Layout
Q11. What is the CSS Box Model?
The CSS Box Model is how browsers calculate the total space an element takes up on a page. Every element is essentially a box with four layers. From inside out, you have the content (the actual text or image), padding (space around the content), border (a line around the padding), and margin (space outside the border separating it from other elements). When you set width and height, you’re typically setting just the content area, but the total space includes padding and border too. Understanding this helps you control spacing and layout precisely.
Q12. Explain the difference between padding and margin.
Padding is the space inside an element, between the content and the border. It’s like the cushioning inside a box. Margin is the space outside an element, between the border and neighboring elements. It’s like the gap between boxes on a shelf. Padding affects the element’s background color and size, while margin creates transparent space between elements. If you want space inside a button around its text, use padding. If you want space between two buttons, use margin.
Q13. What are CSS selectors and what types exist?
CSS selectors are patterns that tell browsers which HTML elements to style. Element selectors target all elements of a type, like p for all paragraphs. Class selectors use a dot, like .button, to target elements with that class. ID selectors use a hash, like #header, to target a single unique element. Attribute selectors target elements based on their attributes. Pseudo-class selectors like :hover target elements in specific states. Combinators like > and + let you select elements based on their relationships to other elements.
Q14. What is CSS specificity and how does it work?
Specificity is how browsers decide which CSS rule wins when multiple rules target the same element. Think of it as a scoring system. Inline styles score highest at 1000 points. IDs score 100 points each. Classes, attributes, and pseudo-classes score 10 points each. Element selectors score 1 point. When there’s a conflict, the rule with the higher specificity score wins. If scores tie, the rule that appears last in your CSS file wins. Understanding specificity helps you write CSS that behaves predictably.
Q15. Explain Flexbox and when you would use it.
Flexbox is a CSS layout system that makes it easy to arrange items in rows or columns and control their alignment and spacing. It’s perfect for creating navigation bars, card layouts, or any situation where you want elements to distribute themselves evenly or center themselves. You set display: flex on a container, and its children become flex items. You can then use properties like justify-content to align items horizontally, align-items to align them vertically, and flex-wrap to control whether items wrap to new lines. Flexbox excels at one-dimensional layouts.
Q16. What is CSS Grid and how does it differ from Flexbox?
CSS Grid is a two-dimensional layout system that lets you create complex layouts with rows and columns simultaneously. While Flexbox works in one direction at a time (either rows or columns), Grid works in both directions at once. Grid is perfect for page layouts where you need precise control over both horizontal and vertical positioning. You define a grid with display: grid, then specify rows and columns using grid-template-rows and grid-template-columns. Use Grid for overall page layout and Flexbox for components within those grid areas.
Q17. What are CSS media queries and why are they important?
Media queries let you apply different CSS styles based on device characteristics like screen width, height, or orientation. They’re the foundation of responsive design, allowing your website to adapt to phones, tablets, and desktops. A typical media query looks like @media (max-width: 768px) { }, which applies styles only when the screen is 768 pixels wide or less. Inside the curly braces, you write CSS that changes layouts, font sizes, or hides elements to make your site work better on smaller screens.
Q18. Explain the different CSS position properties.
Static is the default position where elements follow the normal document flow. Relative lets you move an element relative to where it would normally be, using properties like top, right, bottom, and left. Absolute removes an element from the normal flow and positions it relative to its nearest positioned ancestor. Fixed positions an element relative to the browser window, so it stays in place when you scroll. Sticky is a hybrid – it acts like relative until you scroll past it, then it sticks like fixed. Each has specific use cases for different layout needs.
Q19. What are CSS combinators?
Combinators are symbols that explain the relationship between selectors. The descendant combinator (space) selects all matching descendants, like div p selects all paragraphs inside divs. The child combinator > selects only direct children, like div > p selects only paragraphs that are immediate children of divs. The adjacent sibling combinator + selects the element immediately following, like h1 + p selects the first paragraph after an h1. The general sibling combinator ~ selects all siblings, like h1 ~ p selects all paragraphs that follow an h1 at the same level.
Q20. What are CSS units and which ones should you use?
CSS has absolute units like pixels (px) and relative units like percentages, em, rem, vh, and vw. Pixels are fixed sizes that don’t change. Percentages are relative to the parent element. Em units are relative to the element’s font size, while rem units are relative to the root element’s font size. Viewport units (vh and vw) are percentages of the browser window size. For responsive design, prefer relative units like rem for fonts, percentages or viewport units for widths, and pixels only when you need exact measurements. This makes your site adapt better to different screen sizes.

🎓 Start Learning MERN Stack with Our Course →
Section 2: JavaScript Core Concepts
JavaScript Basics
Q21. What are variables in JavaScript and how do you declare them?
Variables are containers that store data values you can use and change throughout your program. In modern JavaScript, you declare variables using let, const, or the older var. Use let when the value might change, like a counter. Use const when the value should never change, like a user’s ID or a configuration setting. Avoid var in modern code because it has confusing scoping rules. Good variable names describe what they store, like userName or productPrice, making your code easier to understand.
Q22. Explain the different data types in JavaScript.
JavaScript has primitive types and objects. The primitive types are numbers (like 42 or 3.14), strings (text in quotes like “hello”), booleans (true or false), undefined (a variable declared but not assigned), null (intentionally empty), symbol (unique identifiers), and bigint (very large numbers). Objects are complex data types that can hold multiple values and functions. Arrays are special objects for ordered lists. Understanding these types helps you choose the right one for your data and avoid bugs from type-related mistakes.
Q23. What is the difference between == and === in JavaScript?
The double equals == compares values after converting them to the same type. So “5” == 5 is true because JavaScript converts the string to a number before comparing. The triple equals === compares both value and type without any conversion. So “5” === 5 is false because one is a string and one is a number. Always use === (strict equality) unless you specifically need type coercion. It makes your code more predictable and prevents unexpected bugs from automatic type conversions.
Q24. Explain truthy and falsy values in JavaScript.
In JavaScript, every value is either truthy or falsy when used in a condition. Falsy values are false, 0, empty string (“”), null, undefined, and NaN. Everything else is truthy, including the string “0”, the string “false”, empty arrays, and empty objects. This matters in if statements and logical operations. For example, if (userName) checks if userName exists and isn’t empty. Understanding truthy and falsy values helps you write shorter, more elegant conditionals.
Q25. What are JavaScript operators and what types exist?
Operators are symbols that perform operations on values. Arithmetic operators like +, –, *, / do math. Comparison operators like >, <, >=, <= compare values. Logical operators like && (and), || (or), ! (not) combine conditions. Assignment operators like =, +=, -= assign values. The ternary operator ? : is a shorthand if-else. String operators concatenate text with +. Understanding operators is fundamental because you use them in almost every line of code to manipulate and compare data.
Q26. Explain conditional statements in JavaScript.
Conditional statements let your code make decisions. The if statement runs code only when a condition is true. Add else to run different code when the condition is false. Use else if to check multiple conditions in order. The switch statement is cleaner when checking one variable against many possible values. The ternary operator condition ? valueIfTrue : valueIfFalse is a shorthand for simple if-else statements. Conditionals are how you make your programs respond differently to different situations.
Q27. What are loops in JavaScript and when do you use each type?
Loops repeat code multiple times. The for loop is perfect when you know how many times to loop, like iterating through an array by index. The while loop continues as long as a condition is true, useful when you don’t know how many iterations you need. The do…while loop is similar but always runs at least once. The for…of loop iterates over array values directly. The for…in loop iterates over object properties. Choose the loop type based on what you’re iterating over and whether you need the index.
Q28. What are arrays and how do you work with them?
Arrays are ordered lists that store multiple values in a single variable. You create them with square brackets, like let fruits = [“apple”, “banana”, “orange”]. Access items by their index (position), starting from 0. Arrays have many useful methods: push() adds to the end, pop() removes from the end, shift() removes from the start, unshift() adds to the start, slice() copies a portion, splice() adds or removes items anywhere, and forEach() runs a function on each item. Arrays are essential for working with lists of data.
Q29. Explain JavaScript objects and how to create them.
Objects are collections of key-value pairs that represent real-world things. You create them with curly braces: let person = { name: “John”, age: 30, city: “New York” }. Access properties using dot notation person.name or bracket notation person[“name”]. Objects can contain any data type, including arrays and other objects. They can also contain functions, which are called methods. Objects are fundamental to JavaScript and are used to organize related data and functionality together in a logical way.
Q30. What are functions in JavaScript?
Functions are reusable blocks of code that perform specific tasks. You define them with the function keyword, give them a name, list parameters in parentheses, and write code in curly braces. Functions can take inputs (parameters) and return outputs. They help you avoid repeating code, make your programs more organized, and easier to test. You can pass functions as arguments to other functions, return them from functions, and store them in variables. Functions are one of the most important concepts in JavaScript programming.
Advanced JavaScript
Q31. What are arrow functions and how do they differ from regular functions?
Arrow functions are a shorter syntax for writing functions, introduced in ES6. Instead of writing function(x) { return x * 2; }, you write (x) => x * 2. They’re more concise and have an implicit return when you don’t use curly braces. The key difference is how they handle the this keyword – arrow functions don’t have their own this, they inherit it from the surrounding code. This makes them perfect for callbacks and array methods, but not suitable as object methods when you need to access the object through this.
Q32. Explain JavaScript closures with an example.
A closure is when a function remembers variables from the place where it was created, even after that place has finished executing. Think of it like a backpack – the function carries variables with it wherever it goes. For example, if you create a counter function that returns another function, the inner function can still access and modify the counter variable even after the outer function has returned. Closures are powerful for creating private variables and factory functions that generate customized functions.
Q33. What is hoisting in JavaScript?
Hoisting is JavaScript’s behavior of moving variable and function declarations to the top of their scope before code execution. This means you can call a function before you define it in your code, and it still works. However, only the declaration is hoisted, not the initialization. For var variables, the declaration is hoisted but the value is undefined until the assignment line runs. Let and const are also hoisted but remain in a “temporal dead zone” until their declaration line, causing an error if accessed early. Function declarations are fully hoisted with their implementations.
Q34. Explain the difference between let, var, and const.
Var is function-scoped, meaning it’s accessible throughout the entire function. It’s hoisted and can be redeclared. Let is block-scoped, meaning it only exists within the curly braces where it’s declared. It can be reassigned but not redeclared in the same scope. Const is also block-scoped but can’t be reassigned after creation – it’s constant. However, if a const holds an object or array, you can still modify the contents, just not reassign the entire variable. Always prefer const by default, use let when you need to reassign, and avoid var in modern code.
Q35. What are template literals and why are they useful?
Template literals are strings created with backticks instead of quotes, allowing you to embed expressions and create multi-line strings easily. You can inject variables directly using ${variableName} syntax, like “Hello, ${userName}!”. This is much cleaner than concatenating strings with plus signs. They also preserve line breaks, making multi-line strings easy to write without escape characters. Template literals make your code more readable and maintainable, especially when building strings with dynamic content or HTML templates.
Q36. Explain destructuring in JavaScript.
Destructuring lets you unpack values from arrays or properties from objects into separate variables in one line. For arrays, you use square brackets: let [first, second] = [^1][^2]. For objects, you use curly braces: let {name, age} = person. You can set default values, skip elements, and even rename variables. Destructuring makes your code cleaner and more readable, especially when working with function parameters that are objects, or when extracting multiple values from API responses.
Q37. What is the spread operator and how do you use it?
The spread operator … expands an array or object into individual elements. You can use it to copy arrays: let newArray = […oldArray]. You can combine arrays: let combined = […array1, …array2]. It works with objects too: let newObj = {…oldObj, newProp: “value”}. It’s perfect for passing array elements as function arguments: Math.max(…numbers). The spread operator creates shallow copies, which is useful for avoiding mutations in React and keeping your data immutable.
Q38. What are promises in JavaScript?
A promise represents a value that might not be available yet but will be at some point in the future. Think of it like ordering food online – you get a promise that your food will arrive, and you can plan what to do when it arrives or what to do if there’s a problem. Promises have three states: pending (waiting), fulfilled (success), or rejected (error). You use .then() to handle success and .catch() to handle errors. Promises make asynchronous code easier to read and manage than traditional callbacks.
Q39. Explain async/await and how it simplifies asynchronous code.
Async/await is syntactic sugar that makes promise-based code look and behave like synchronous code. You mark a function as async, which makes it return a promise. Inside, you use await before promises to pause execution until they resolve. This eliminates nested .then() chains and makes code read top-to-bottom like regular code. You handle errors with try-catch blocks instead of .catch(). Async/await is the modern way to handle asynchronous operations like API calls, making your code cleaner and easier to understand.
Q40. What is the event loop in JavaScript?
The event loop is JavaScript’s mechanism for handling asynchronous operations despite being single-threaded. JavaScript can only do one thing at a time, but the event loop lets it handle multiple operations efficiently. When you make an API call or set a timeout, JavaScript delegates it to the browser’s APIs and continues executing other code. When the async operation completes, its callback goes into a queue. The event loop constantly checks if the call stack is empty, and if so, takes callbacks from the queue and executes them. This allows JavaScript to be non-blocking and responsive.
📘 Learn JS Faster: Practical How-To Guides →
Section 3: React Development
React Fundamentals
Q41. What is React and why do we use it?
React is a JavaScript library for building user interfaces, created by Facebook. It lets you break your UI into small, reusable pieces called components. React makes it easy to build complex, interactive applications by managing how your UI updates when data changes. Instead of manually manipulating the DOM every time something changes, you describe what your UI should look like based on your data, and React efficiently updates only what needs to change. It’s popular because it’s fast, has a huge ecosystem, and makes code more maintainable.
Q42. Explain the Virtual DOM and how it works.
The Virtual DOM is React’s secret weapon for performance. It’s a lightweight copy of the actual DOM kept in memory. When your data changes, React creates a new Virtual DOM, compares it with the previous version to find what changed (called diffing), then updates only those specific parts in the real DOM. This is much faster than updating the entire DOM. Think of it like editing a document – instead of rewriting the whole thing, you just change the words that are different. The Virtual DOM is why React apps feel fast and responsive.
Q43. What are React components?
Components are independent, reusable pieces of UI. Think of them as LEGO blocks – you build complex interfaces by combining simple components. Each component is a JavaScript function or class that returns JSX describing what should appear on screen. You might have a Button component, a Header component, a Product Card component, etc. Components can be nested inside other components. This modular approach makes your code organized, reusable, and easier to test. Good components do one thing well and can be used anywhere in your application.
Q44. What is JSX?
JSX is a syntax extension that lets you write HTML-like code inside JavaScript. It looks like HTML but it’s actually JavaScript that React transforms into function calls. You can embed JavaScript expressions in JSX using curly braces, like `{user Name}` or `{2 + 2}`. JSX makes your React code readable because the UI structure is obvious. Under the hood, `<div>Hello</div>` becomes `React. create Element(‘div’, null, ‘Hello’)`. While JSX isn’t required, it makes React development much more pleasant and intuitive.
Q45. What are props in React?
Props (short for properties) are how you pass data from parent components to child components. They’re like function arguments – you pass them when using a component, and the component receives them as an object. Props are read-only; a component can’t change its own props. For example, you might pass a user’s name to a Greeting component: <Greeting name=”John” />, and inside Greeting, you access it as props.name. Props make components reusable because you can pass different data to the same component to get different results.
Q46. What is state in React?
State is data that belongs to a component and can change over time. Unlike props which come from outside, state is private and controlled by the component. When state changes, React re-renders the component to show the new data. You manage state using the use State hook in functional components. For example, tracking whether a modal is open, storing form inputs, or counting button clicks all require state. State is what makes your React apps interactive and dynamic.
Q47. Explain the use State hook.
The use State hook lets functional components have state. You call it with an initial value and it returns an array with two elements: the current state value and a function to update it. You typically de structure these: const [count, set Count] = use State(0). To update state, you call the setter function with the new value: set Count(count + 1). React will re-render the component with the new state. The use State hook made functional components powerful enough to replace class components in most cases.
Q48. What is the use Effect hook and when do you use it?
The use Effect hook lets you perform side effects in functional components. Side effects are things like fetching data, subscribing to services, updating the DOM, or setting timers. You pass it a function that runs after every render by default. You can control when it runs by passing a dependency array as the second argument. An empty array means it runs once after the first render. If you include variables in the array, it runs whenever those variables change. Use use Effect for anything that needs to happen outside the normal render flow.
Q49. What is conditional rendering in React?
Conditional rendering means showing different UI based on conditions. You can use an if statement to decide what to return. You can use the ternary operator directly in JSX: `{is Logged In ? <Dashboard /> : <Login />}`. You can use the logical AND operator for showing something or nothing: `{error && <Error Message />}`. You can also store elements in variables and render them conditionally. Conditional rendering is fundamental to creating dynamic interfaces that respond to user actions and application state.
Q50. How do you handle lists in React?
You render lists by mapping over an array and returning JSX for each item. Each item needs a unique key prop to help React identify which items changed, were added, or removed. The key should be stable and unique, usually an ID from your data: {users.map(user => <User Card key={user.id} user={user} />)}. Don’t use array indexes as keys if the list can change order. Keys help React update lists efficiently and preserve component state. Handling lists properly is essential for displaying dynamic data like products, comments, or search results.
Advanced React Concepts
Q51. What are custom hooks and why create them?
Custom hooks are functions that use React hooks and let you reuse stateful logic across components. They must start with “use” like use Form or use Fetch. Custom hooks extract repeated patterns into reusable functions. For example, if multiple components need to fetch data, you could create a use Fetch hook that handles loading states, errors, and data. This keeps your components clean and focused on rendering. Custom hooks don’t share state between components – each component that uses a custom hook gets its own independent state.
Q52. Explain the use Ref hook and its use cases.
The use Ref hook creates a mutable reference that persists across renders without causing re-renders when it changes. It has two main uses: accessing DOM elements directly (like focusing an input) and storing values that shouldn’t trigger renders (like previous state values or timers). You create a ref with const my Ref = use Ref (initial Value) and access its value through my Ref. current. For DOM access, you attach it to JSX with the ref attribute. Unlike state, changing a ref doesn’t cause the component to re-render.
Q53. What is the Context API and when should you use it?
The Context API is React’s built-in solution for sharing data across components without passing props through every level (avoiding “prop drilling”). You create a context with create Context(), wrap components with a Provider that supplies the value, and consume the value in child components with the use Context hook. Use Context for data that’s truly global, like user authentication, theme settings, or language preferences. Don’t overuse it though – prop drilling for a few levels is often clearer. Context is perfect for data needed by many components at different nesting levels.
Q54. What is prop drilling and how do you solve it?
Prop drilling is when you pass props through many levels of components just to get data to a deeply nested component. For example, passing user data from App through five intermediate components just so the Profile Picture component can use it. It makes code messy and hard to maintain. Solutions include the Context API for truly global state, composition (passing components as props), or state management libraries like Redux. The key is evaluating whether data is truly global or if your component structure could be improved.
Q55. Explain the use Reducer hook and when to use it over use State.
The use Reducer hook is for managing complex state logic. Instead of directly setting state, you dispatch actions, and a reducer function determines how state changes based on the action. It’s similar to Redux but built into React. Use use Reducer when state updates depend on previous state, when you have multiple sub-values, or when state logic is complex. For example, a form with many fields, validation, and submission states benefits from use Reducer. The pattern is const [state, dispatch] = use Reducer(reducer, initial State), then you dispatch actions like dispatch({type: ‘INCREMENT’}).
Q56. What are React lifecycle methods and their equivalents in hooks?
In class components, lifecycle methods like component Did Mount, component Did Update, and component Will Unmount controlled side effects at different stages. In functional components with hooks, use Effect replaces all of these. An empty dependency array mimics component Did Mount (runs once). Including dependencies mimics component Did Update (runs when those values change). Returning a clean up function mimics component Will Unmount (runs before unmounting or before the next effect). Hooks simplified lifecycle management by combining related logic that was previously split across multiple lifecycle methods.
Q57. What is React.memo and when should you use it?
React.memo is a higher-order component that prevents unnecessary re-renders by memoizing the result. It does a shallow comparison of props, and only re-renders if they change. Wrap a component with React.memo (YourComponent) to optimize it. Use it for components that render the same output given the same props, especially expensive components or frequently rendered components in lists. Don’t overuse it though – memoization has overhead, so only apply it when you have performance issues. Profile first, then optimize where needed.
Q58. Explain the useMemo hook.
The useMemo hook memoizes expensive calculations so they only run when dependencies change, not on every render. You pass it a function that returns a value and a dependency array: const expensiveValue = useMemo(() => compute Expensive Value(a, b), [a, b]). The calculation only re-runs when a or b changes. Use useMemo for computationally expensive operations like filtering large arrays or complex calculations. Don’t use it for simple operations – the memoization overhead might cost more than just recalculating. It’s about finding the right balance for performance optimization.
Q59. What is the useCallback hook?
The useCallback hook memoizes functions so they maintain the same reference across renders unless dependencies change. This is useful when passing callbacks to optimized child components wrapped in React.memo, because a new function reference would cause unnecessary re-renders. The syntax is const memoizedCallback = useCallback(() => { doSomething(a, b) }, [a, b]). Without useCallback, a new function is created on every render. Use it when passing functions as props to memoized components or when functions are dependencies of other hooks.
Q60. What is the difference between controlled and uncontrolled components?
Controlled components have their form data handled by React state. You set the input’s value from state and update state onChange. React is the “single source of truth” for the input’s value. Uncontrolled components let the DOM handle form data itself, and you access values with refs when needed. Controlled components are recommended because they give you more control, allow validation on every keystroke, and make it easier to manipulate or reset the form. Uncontrolled components are useful for simple cases or integrating with non-React code.
React Routing and Navigation
Q61. What is React Router and why do we need it?
React Router is a library that enables navigation between different views in a single-page application. Without it, clicking links would reload the entire page. React Router lets you define routes that render different components based on the URL, creating a multi-page feel while staying a single-page app. It manages browser history, handles URL parameters, and provides navigation hooks. It’s essential for any React app with multiple views because it gives users the expected browsing experience with back/forward buttons, bookmarkable URLs, and shareable links.
Q62. How do you set up basic routing in React Router?
You install react-router-dom, then wrap your app with Browser Router. Define routes using the Routes and Route components. Each Route has a path and an element to render: `<Route path=”/about” element={<About />} />`. The path “/” is typically your homepage. Use Link components instead of anchor tags for navigation: `<Link to=”/about”>About</Link>`. This prevents full page reloads. You can nest routes, create dynamic routes with parameters, and set up redirects. React Router v6 simplified the API compared to earlier versions.
Q63. Explain the use Navigate hook.
The use Navigate hook lets you programmatically navigate to different routes in your code, not just from links. You call it to get a navigate function: const navigate = use Navigate(). Then call navigate with a path: navigate(‘/dashboard’). You can pass a number to go back or forward in history: navigate(-1) goes back. You can also pass state with the navigation: navigate(‘/profile’, { state: { userId: 123 } }). Use use Navigate after form submissions, button clicks, or when you need to redirect users based on logic.
Q64. What is the use Params hook?
The use Params hook extracts parameters from the current route. When you define a route with parameters like /users/:user Id, the user Id becomes accessible in your component. Call use Params and de structure the parameter: const { user Id } = use Params(). Now you can use user Id to fetch the specific user’s data or pass it to child components. This is essential for creating dynamic routes where one component handles many similar pages, like product details, user profiles, or blog posts. Parameters let you build flexible, reusable route components.
Q65. How do you create protected routes in React?
Protected routes restrict access to certain pages based on authentication status. Create a Protected Route component that checks if the user is authenticated. If authenticated, render the requested component using the Outlet component. If not, redirect to login using Navigate. Wrap your protected routes with this component. You typically check authentication state from Context or Redux. For example, check if a token exists in local Storage or if a user object is in global state. Protected routes ensure sensitive pages like dashboards or user settings are only accessible to logged-in users.
Q66. What is the use Search Params hook?
The use Search Params hook works with query parameters in URLs, like /search ?term=react & page=2. It returns an array similar to use State: const [search Params, set Search Params] = use Search Params(). Get parameters with search Params. get(‘term’). Set parameters with set Search Params({ term: ‘react’, page: 2 }). This updates the URL without a full page reload. Use it for filters, search terms, pagination, or any state that should be reflected in the URL so users can bookmark or share links that restore the exact view.
Q67. Explain the difference between Link and Nav Link.
Both Link and Nav Link create navigation links without full page reloads, but Nav Link is specifically for navigation menus. Nav Link automatically receives an “active” class when its route matches the current URL, making it perfect for highlighting the current page in navigation bars. You can customize the active class name or apply inline styles. Use Link for regular navigation like cards or buttons that go to other pages. Use Nav Link in headers, sidebars, or navigation menus where you want to show users their current location visually.
State Management Libraries
Q68. What is Redux and why would you use it?
Redux is a predictable state management library for JavaScript apps. It creates a single global store that holds all your application state. Components can read from the store and dispatch actions to update it. Redux enforces a strict pattern: actions describe what happened, reducers specify how state changes, and the store brings them together. Use Redux when you have complex state logic, many components need the same data, or state changes are happening in too many places. It makes state changes predictable, debugging easier with time-travel, and testing simpler.
Q69. Explain the core concepts of Redux: actions, reducers, and store.
Actions are plain objects that describe something that happened, with a type property and optional payload. Reducers are pure functions that take the current state and an action, then return a new state. The store holds your application state and provides methods to access it, dispatch actions, and subscribe to changes. The flow is: component dispatches action → reducer processes action and returns new state → store updates → components re-render with new state. This unidirectional data flow makes complex applications more predictable and easier to debug.
Q70. What is the difference between Redux and Context API?
Context API is built into React for passing data through the component tree without props. Redux is a separate library with more features. Context is simpler and great for truly global state like themes or auth. Redux provides middleware, dev tools, time-travel debugging, and a strict pattern for state updates. Redux is better for large apps with complex state logic, frequent updates, or when you need powerful debugging tools. Context is better for simple cases where you just need to avoid prop drilling. You can even use both together.
Q71. Explain Redux middleware and give examples.
Middleware sits between dispatching an action and the moment it reaches the reducer. It can intercept actions to perform side effects like logging, making API calls, or transforming actions. Redux Thunk lets you dispatch functions instead of objects, perfect for async operations. Redux Saga uses generator functions for complex async flows. Logger middleware logs every action and state change. Middleware is how you handle asynchronous operations in Redux since reducers must be pure and synchronous. It’s a powerful extension point for customizing Redux behaviour.
Q72. What are Redux Toolkit and why should you use it?
Redux Toolkit is the official, opinionated toolset for Redux that simplifies common tasks. It includes create Slice which generates actions and reducers in one place, configure Store which sets up the store with good defaults, and create Async Thunk for handling async logic. Redux Toolkit reduces boilerplate significantly and enforces best practices like using Immer for immutable updates. If you’re starting a new Redux project, you should use Redux Toolkit instead of vanilla Redux. It makes Redux development much more pleasant and productive.
Q73. How do you use the useSelector hook?
The useSelector hook extracts data from the Redux store in functional components. You pass it a selector function that receives the entire state and returns the piece you need: const user = useSelector(state => state.user). React Redux re-renders your component when the returned value changes. You can use multiple useSelector calls for different pieces of state. Keep selectors simple and focused. For complex derived state, create reusable selector functions. Use useSelector instead of the older connect HOC in modern functional components.
Q74. How do you use the useDispatch hook?
The useDispatch hook returns a reference to the dispatch function from the Redux store. You call it to get dispatch: const dispatch = useDispatch(). Then use dispatch to send actions: dispatch(increment()) or dispatch({ type: ‘INCREMENT’ }). If using Redux Thunk, you can dispatch async functions: dispatch(fetchUserData(userId)). The useDispatch hook replaces the mapDispatchToProps pattern from connect. It’s cleaner and more straightforward for dispatching actions in functional components.
React Styling Solutions
Q75. What are CSS Modules and how do you use them in React?
CSS Modules scope CSS to a specific component automatically, preventing style conflicts. You create a file like `Button.module.css`, write regular CSS, then import it as an object: `import styles from ‘./Button.module.css’`. Apply classes using the imported object: `<button className={styles.primary}>Click</button>`. Build tools transform class names to unique strings, so `.primary` becomes something like `Button_primary_abc123`. Styles from one component can’t accidentally affect another. CSS Modules give you the simplicity of CSS with the safety of scoped styles, perfect for component-based architecture.
Q76. What is styled-components and why use it?
Styled-components is a CSS-in-JS library that lets you write CSS directly in your JavaScript files using tagged template literals. You create styled components by calling styled.div or styled.button with CSS code. The result is a React component with those styles applied. Props can affect styles, making dynamic styling easy. Styles are scoped to components automatically, and unused styles are never shipped. The CSS is actually in your JavaScript, so you get the full power of JavaScript for styling logic. It’s popular because it keeps styles close to components and makes styling highly dynamic.
Q77. Explain Chakra UI and its benefits.
Chakra UI is a component library that provides pre-built, accessible React components with great defaults. It uses a style props approach where you apply styling directly on components with props like bg=”blue” or p={4} for padding. It includes common components like buttons, modals, forms, and layouts. Chakra UI follows accessibility best practices automatically and provides a built-in dark mode system. It speeds up development because you don’t build common components from scratch, and its design system helps maintain consistency. The style props make one-off adjustments easy without writing CSS.
Q78. What is Tailwind CSS and how do you use it with React?
Tailwind CSS is a utility-first CSS framework providing low-level classes like flex, pt-4, text-center, and bg-blue-500. Instead of writing CSS, you compose these classes in your JSX. It might look verbose at first, but you can build responsive, custom designs quickly without leaving your HTML. With React, you apply classes to elements normally: <div class Name=”flex items-center justify-between”>. Tailwind’s JIT compiler includes only the classes you use, keeping bundle sizes small. It’s popular because it’s faster than writing custom CSS and more flexible than component libraries.
Q79. How do you handle global styles versus component styles in React?
Global styles affect the entire application and are typically defined in a global CSS file imported in your index.js. Use them for resets, font declarations, and truly global rules. Component styles are scoped to specific components using CSS Modules, styled-components, or component-level CSS files. The strategy is: keep most styles scoped to components for maintainability and predictability, use global styles only for foundational rules that genuinely apply everywhere. This hybrid approach prevents style conflicts while maintaining consistent global design tokens like colors and typography.
Q80. What are the pros and cons of CSS-in-JS?
CSS-in-JS (like styled-components or emotion) pros: styles are scoped automatically, you can use JavaScript logic in styles, unused styles aren’t included, component and styles stay together, and dynamic styling is easier. Cons: there’s a runtime cost of parsing styles, it can make React Dev Tools messier, debugging can be harder, and team members need to learn the library. It’s great for apps where styles change based on props or state frequently. For apps with mostly static styles, traditional CSS or CSS Modules might be simpler and more performant.
TypeScript with React
Q81. Why use TypeScript with React?
TypeScript adds static type checking to JavaScript, catching errors before runtime. With React, you get autocompletion for props, immediate feedback when you pass wrong types, better refactoring confidence, and self-documenting code. TypeScript makes component interfaces explicit – you know exactly what props a component expects. It catches common mistakes like typos, wrong types, or missing required props during development, not in production. The initial setup takes time, but it pays off in fewer bugs, better developer experience, and more maintainable code, especially in large projects or teams.
Q82. How do you type React component props?
Define a TypeScript interface or type for your props, then use it when declaring your component. For functional components: interface Button Props { label: string; onClick: () => void; disabled?: boolean; } then const Button: React. FC<Button Props> = ({ label, on Click, disabled }) => { }. The question mark makes a prop optional. TypeScript will now error if you pass wrong types, forget required props, or access props that don’t exist. This self-documenting approach makes components easier to use and maintain.
Q83. How do you type use State in TypeScript?
TypeScript often infers the type from the initial value, but you can be explicit using generics. For simple types: const [count, set Count] = use State<number>(0). For objects or when initial value is null: const [user, set User] = use State<User | null>(null). Define the User interface separately. For arrays: const [items, set Items] = use State<string[]>([]). Being explicit prevents accidentally setting state to the wrong type and gives better autocompletion. When TypeScript can infer the type correctly, you can omit the generic for cleaner code.
Q84. What are TypeScript generics and how are they used in React?
Generics let you create reusable components that work with multiple types while maintaining type safety. They’re like function parameters but for types. A generic component might be a List that can display items of any type: `function List<T>({ items }: { items: T[] }) { }`. When you use it, TypeScript infers or you specify the type: `<List<User> items={users} />`. React’s built-in types use generics extensively, like `use State<T>` and `React .FC<Props Type>`. Generics make code flexible without sacrificing type safety, which is essential for reusable utility components and hooks.
Q85. How do you handle events in TypeScript React?
Event handlers need specific event types from React. For click events: `on Click: (event: React.MouseEvent<HTMLButtonElement>) => void`. For form changes: `on Change: (event: React.ChangeEvent<HTMLInputElement>) => void`. For form submission: `on Submit: (event: React.FormEvent<HTMLFormElement>) => void`. You can also hover over the event in your IDE to see its type. If you don’t need the event object, you can omit the parameter. TypeScript’s event types ensure you access event properties safely and get autocompletion for event methods.
Testing in React
Q86. What is React Testing Library and why use it?
React Testing Library is a testing tool focused on testing components from the user’s perspective. Instead of testing implementation details like state or internal methods, you test behaviour – rendering, interacting, and observing changes. You render components, query elements the way users would (by label, text, role), simulate interactions, and assert what the user sees. This approach creates more resilient tests that don’t break when you refactor implementation. It encourages writing accessible components because you select elements by accessible attributes. It’s become the standard for React testing.
Q87. How do you test a React component?
First, render the component using the render function from React Testing Library. Then query for elements using methods like get By Text, get By Role, or get By Label Text. Simulate user actions with fire Event or user Event like fire Event .click(button). Make assertions using Jest matchers like expect(element).to Be In The Document(). For async behaviour, use wait For or find By queries. Test what users see and do, not implementation details. A good test renders the component, interacts with it like a user would, and verifies the expected outcome.
Q88. What is the difference between unit tests, integration tests, and end-to-end tests?
Unit tests test individual functions or components in isolation, often with dependencies mocked. They’re fast and pinpoint exactly what broke. Integration tests test how multiple components work together, ensuring they integrate correctly. They might test a form component with all its child input components. End-to-end tests test complete user flows through the real application, from logging in to completing a purchase. They use tools like Cypress or Playwright. Use mostly unit tests, some integration tests, and a few critical end-to-end tests. This “testing pyramid” balances coverage, speed, and maintenance.
Q89. What is Cypress and how does it differ from React Testing Library?
Cypress is an end-to-end testing framework that tests your application in a real browser, simulating actual user behaviour. It visits URLs, clicks buttons, fills forms, and asserts the outcome like a real user would. Unlike React Testing Library which tests components in isolation, Cypress tests the entire application with backend, routing, and all. Cypress tests are slower but catch issues React Testing Library can’t, like integration problems, API issues, or cross-page workflows. Use React Testing Library for component testing and Cypress for critical user journeys to ensure your app works end-to-end.
Q90. How do you test components that make API calls?
Mock the API calls so tests don’t depend on real servers. Use libraries like MSW (Mock Service Worker) to intercept network requests and return test data. Render your component, wait for the data to load using wait For or find By queries, then assert the rendered output. Test loading states, success states, and error states. You can also mock fetch or axios directly with Jest. The key is isolating your component from external dependencies so tests are fast, reliable, and don’t require a running backend.

⚛️ React Learning Roadmap for Beginners →
Section 4: Node.js and Backend Development
Node.js Fundamentals
Q91. What is Node.js and why is it popular?
Node.js is a JavaScript runtime that lets you run JavaScript on the server, outside the browser. It’s built on Chrome’s V8 engine and uses an event-driven, non-blocking I/O model. This makes it fast and efficient for handling many concurrent connections, perfect for real-time applications like chat apps or APIs. With Node.js, you can use JavaScript for both frontend and backend, meaning one language across your stack. It has a huge package ecosystem via npm. It’s popular because it’s fast, scalable, JavaScript-based, and has strong community support.
Q92. Explain the Node.js event loop.
The Node.js event loop is what allows non-blocking operations despite JavaScript being single-threaded. When you make an async call like reading a file or querying a database, Node delegates it to the system and continues executing other code. When the operation completes, its callback is added to a queue. The event loop continuously checks if the call stack is empty, and if so, processes callbacks from the queue. This architecture lets Node handle thousands of concurrent connections efficiently without creating new threads for each one, making it incredibly scalable.
Q93. What are modules in Node.js?
Modules are reusable blocks of code that can be imported into other files. Node.js uses the CommonJS module system. You export functions or objects using module.exports = { } and import them using const myModule = require(‘./myModule’). There are three types: core modules built into Node (like fs, http, path), third-party modules installed via npm, and your own custom modules. Modules help organize code into logical, reusable pieces. ES6 modules (import/export) are also supported in newer Node versions.
Q94. What is npm and what is package.json?
Npm (Node Package Manager) is the default package manager for Node.js. It lets you install, update, and manage third-party libraries and tools. The package.json file is the manifest for your project – it lists dependencies, scripts, project metadata, and configuration. When you run npm install, it reads package.json and installs all listed dependencies into node_modules. Scripts in package.json let you define commands like npm start or npm test. The package-lock.json file locks exact versions to ensure consistent installs across environments. Every Node project should have a package.json.
Q95. Explain the difference between process.nextTick() and setImmediate().
Both schedule callbacks to run later, but with different timing. process.nextTick() schedules a callback to run immediately after the current operation completes, before the event loop continues. It has the highest priority. setImmediate() schedules a callback to run in the next iteration of the event loop, after I/O events. If you call both in the same code block, nextTick always runs first. Use nextTick when you need something to happen before anything else. Use setImmediate for less urgent tasks that can wait for the next cycle.
Q96. What are streams in Node.js?
Streams are objects that let you read or write data piece by piece instead of all at once. Think of streaming video – you start watching while it’s still downloading. There are four types: Readable (reading data), Writable (writing data), Duplex (both), and Transform (modify data as it passes through). Streams are memory-efficient for large files because you process chunks instead of loading everything into memory. They’re perfect for reading large files, uploading files, or piping data from one place to another. The fs.createReadStream() and fs.createWriteStream() are common examples.
Q97. How does Node.js handle child processes?
Node.js can spawn child processes to run system commands or execute other programs. The child_process module provides methods like spawn(), exec(), execFile(), and fork(). Use spawn() for long-running processes with streaming output. Use exec() for quick commands that return buffered output. Use fork() to run other Node.js scripts in separate processes. Child processes run independently and communicate with the parent through event listeners. This lets you leverage multiple CPU cores, run CPU-intensive tasks without blocking the main thread, or execute system commands.
Q98. What is the purpose of Buffer in Node.js?
Buffers are temporary storage spaces for binary data, used when working with streams, files, or network operations. JavaScript originally didn’t handle binary data well, so Node.js added Buffers. They’re like arrays of bytes. You create them from strings, arrays, or allocate fixed sizes: Buffer.from(‘hello’) or Buffer.alloc(10). Buffers are useful for reading files, handling image uploads, working with network protocols, or converting between different encodings. They bridge the gap between JavaScript and binary data that operating systems and networks use.
Q99. Explain error-first callbacks in Node.js.
Error-first callbacks are a Node.js convention where the first parameter of a callback function is an error object (or null if no error), and subsequent parameters contain the results. For example: fs.readFile(‘file.txt’, (err, data) => { if (err) { /* handle error */ } /* use data */ }). This pattern makes error handling consistent across the ecosystem. Always check if err exists before using the results. This convention came before Promises and async/await, which are now preferred for cleaner error handling, but you’ll still see error-first callbacks in many libraries and older code.
Q100. What is the difference between require() and import?
require() is from CommonJS, the original Node.js module system. It loads modules synchronously and can be called anywhere in your code, even conditionally. import is from ES6 modules, used in modern JavaScript. It must be at the top level of files and is statically analyzed. Node.js now supports both. ES6 imports have better static analysis for tree-shaking (removing unused code) and are the future standard. However, many Node packages still use require, and it’s more flexible for dynamic loading. In new projects, prefer import/export unless you need the flexibility of require.
Express.js Framework
Q101. What is Express.js and why use it?
Express.js is a minimal web application framework for Node.js that simplifies building web servers and APIs. Raw Node.js requires lots of boilerplate for common tasks. Express provides a clean API for routing, handling requests and responses, serving static files, and integrating middleware. It’s unopinionated, giving you freedom to structure your app. Express is extremely popular, well-documented, and has a huge ecosystem of middleware. It makes building servers fast and enjoyable compared to using Node.js’s http module directly. Almost every Node.js web application uses Express or a similar framework.
Q102. How do you create a basic Express server?
First, install Express with npm install express. Import it and create an app instance: const express = require(‘express’); const app = express();. Define routes: app.get(‘/’, (req, res) => { res.send(‘Hello World’); }). Start the server: app.listen(3000, () => { console.log(‘Server running on port 3000’); }). Now your server listens on port 3000 and responds to requests to the root path. This simple setup is enough for a basic server. From here, you add more routes, middleware, and functionality as needed.
Q103. What is middleware in Express?
Middleware functions have access to the request object, response object, and the next middleware function. They execute in order and can perform tasks, modify req/res objects, end the request-response cycle, or call next() to pass control to the next middleware. Common uses include logging requests, parsing request bodies, checking authentication, handling CORS, or adding headers. Express itself is essentially a series of middleware functions. You use middleware with app.use(). Understanding middleware is key to Express because almost everything in Express apps is built with middleware.
Q104. Explain the difference between app.use() and app.get().
app.use() registers middleware that runs for all HTTP methods (GET, POST, etc.) and all routes (or routes starting with a specified path). It’s for cross-cutting concerns like logging, parsing, or authentication. app.get() registers a route handler specifically for GET requests to a specific path. Other methods are app.post(), app.put(), app.delete(), etc. Use app.use() for middleware that should run on many/all requests. Use app.get(), app.post(), etc. for route handlers that respond to specific HTTP methods and paths.
Q105. How do you handle route parameters in Express?
Route parameters are URL segments that capture values. Define them with a colon: app.get(‘/users/:userId’, (req, res) => { }). Access them through req.params: const userId = req.params.userId. You can have multiple parameters: /posts/:postId/comments/:commentId. Parameters are strings by default, so parse them if you need numbers. Route parameters are perfect for resource identifiers like user IDs, product IDs, or slugs. They make routes dynamic so one handler can serve many similar requests based on the ID in the URL.
Q106. What is the difference between query parameters and route parameters?
Route parameters are part of the URL path like /users/123 where 123 is a parameter. They identify specific resources and are typically required. Query parameters come after a question mark like /search?term=react&page=2. They’re optional and usually filter, sort, or paginate results. Access route params via req.params and query params via req.query. Use route parameters for identifying resources and query parameters for optional modifiers. For example, /products/:productId identifies which product, while /products?category=electronics&sort=price filters and sorts the list.
Q107. How do you handle POST requests and parse request body in Express?
Express doesn’t parse request bodies by default. Use the built-in middleware: app.use(express.json()) for JSON bodies and app.use(express.urlencoded({ extended: true })) for form data. Then in your route handler, access the parsed body through req.body: `app.post(‘/users’, (req, res) => { const {name, email} = req.body; })`. These middleware functions parse the body and make it available before your route handler runs. Always validate and sanitize user input to prevent security issues.
Q108. How do you implement error handling middleware in Express?
Error handling middleware has four parameters instead of three – error, request, response, and next. It must come after all other middleware and routes. Define it like: app.use((err, req, res, next) => { console.error(err.stack); res.status(500).json({ error: ‘Something went wrong!’ }); }). When you call next(error) anywhere in your app, Express skips to this error handler. You can create multiple error handlers for different types of errors. Proper error handling prevents your server from crashing and provides meaningful feedback to clients.
Q109. What is CORS and how do you handle it in Express?
CORS (Cross-Origin Resource Sharing) is a security feature that blocks web pages from making requests to a different domain than the one serving the page. If your frontend runs on localhost:3000 and your API on localhost:5000, browsers block the requests by default. Install the cors package and use it as middleware: const cors = require(‘cors’); app.use(cors());. This allows all origins. For production, specify allowed origins: app.use(cors({ origin: ‘https://yourdomain.com’ })). CORS errors are common when building separate frontend and backend applications.
Q110. How do you serve static files in Express?
Use the built-in express.static middleware to serve files like images, CSS, and JavaScript. Specify the directory containing your static files: app.use(express.static(‘public’)). Now files in the public folder are accessible directly via URL – public/style.css becomes accessible at http://localhost:3000/style.css. You can set a virtual path prefix: app.use(‘/static’, express.static(‘public’)) makes files accessible at /static/style.css. This is useful for serving uploaded files, frontend builds, or assets.
Advanced Node.js Concepts
Q111. What are async/await patterns in Node.js?
Async/await makes asynchronous code look synchronous, improving readability. Mark functions as async which makes them return promises automatically. Use await before promise-based operations to pause execution until they resolve. Wrap await calls in try-catch blocks for error handling: try { const data = await fetchData(); } catch (error) { console.error(error); }. This eliminates callback hell and nested .then() chains. Async/await is now the standard way to handle asynchronous operations in Node.js, making code cleaner and easier to maintain.
Q112. What is the difference between setTimeout, setImmediate, and process.nextTick?
These three schedule code to run later but with different priorities. process.nextTick() runs immediately after the current operation, before any I/O events. It has the highest priority. setImmediate() runs in the next iteration of the event loop, after I/O events. setTimeout(callback, 0) technically should run immediately but actually queues after setImmediate. Use nextTick for things that must happen before anything else, Understanding this helps you optimize performance and avoid blocking the event loop.
Q113. What are EventEmitters in Node.js?
EventEmitters are objects that emit named events and allow you to listen for those events. Many Node.js core modules inherit from EventEmitter. You create one with: const EventEmitter = require(‘events’); const myEmitter = new EventEmitter();. Register listeners with myEmitter.on(‘event’, callback) and emit events with myEmitter.emit(‘event’, data). Use once() for one-time listeners. EventEmitters enable the observer pattern, allowing loose coupling between components. They’re useful for creating custom event-driven architectures in your applications.
Q114. How does clustering work in Node.js?
Node.js runs on a single thread by default, not utilizing multiple CPU cores. The cluster module lets you create child processes (workers) that share the same server port. The master process forks workers using cluster.fork(), and each worker handles requests independently. If a worker crashes, the master can spawn a new one. This horizontally scales your Node.js application across CPU cores. Use const numCPUs = require(‘os’).cpus().length to determine how many workers to create. Clustering dramatically improves performance for CPU-intensive applications.
Q115. What is the purpose of package-lock.json?
Package-lock.json locks the exact versions of all dependencies and their dependencies, ensuring everyone on your team installs identical versions. Without it, npm install might install different versions because of semantic versioning ranges in package.json. The lock file contains the complete dependency tree with exact versions and checksums. Always commit it to version control. This prevents the “works on my machine” problem where different versions cause bugs. It makes builds reproducible and deployments predictable, which is critical for production applications.

🔥 Master Backend with Our Full MERN Course →
Section 5: MongoDB and Database Management
MongoDB Basics
Q116. What is MongoDB and why use it?
MongoDB is a NoSQL database that stores data in flexible, JSON-like documents instead of tables and rows. Each document can have a different structure, making it perfect for evolving schemas. It’s schema-less, meaning you don’t need to define your data structure beforehand. MongoDB scales horizontally easily, handles large volumes of data efficiently, and integrates naturally with JavaScript since documents are similar to JavaScript objects. Use MongoDB when you need flexibility, scalability, or when working with unstructured data. It’s the “M” in MERN stack and works seamlessly with Node.js.
Q117. What is the difference between SQL and NoSQL databases?
SQL databases like MySQL or PostgreSQL use structured tables with predefined schemas, rows, and columns. They enforce relationships through foreign keys and use SQL for querying. NoSQL databases like MongoDB use flexible documents, key-value pairs, or graphs. SQL databases are ACID-compliant ensuring data integrity, while NoSQL databases prioritize availability and partition tolerance. Use SQL for complex relationships, transactions, and fixed schemas. Use NoSQL for flexible schemas, horizontal scaling, and when dealing with large volumes of varied data. Neither is universally better – choose based on your specific needs.
Q118. What are collections and documents in MongoDB?
A collection is like a table in SQL – it’s a group of MongoDB documents. A document is like a row in SQL – it’s a single record stored in BSON (Binary JSON) format. Documents in the same collection don’t need identical structures. For example, a users collection might contain user documents with fields like name, email, and age. Each document has a unique _id field automatically created by MongoDB. Collections are created implicitly when you first store data. Think of databases containing collections, which contain documents – a hierarchy of organization for your data.
Q119. Explain CRUD operations in MongoDB.
CRUD stands for Create, Read, Update, Delete – the four basic database operations. Create uses insertOne() or insertMany() to add documents. Read uses find() to query documents, findOne() for a single document. Update uses updateOne(), updateMany(), or findOneAndUpdate() to modify documents. Delete uses deleteOne() or deleteMany() to remove documents. Each operation accepts a query object to specify which documents to affect and options for fine-tuning behavior. These operations form the foundation of all database interactions in your MERN stack applications.
Q120. What is the _id field in MongoDB?
The _id field is a unique identifier automatically assigned to every document. MongoDB generates it as an ObjectId – a 12-byte identifier that includes a timestamp, making it roughly sortable by creation time. You can provide your own _id value when inserting, but it must be unique within the collection. The _id field is indexed automatically for fast lookups. Use _id to reference documents, create relationships, or query specific records. ObjectIds are designed to be globally unique, so you can generate them on the client side without conflicts.
Mongoose ODM
Q121. What is Mongoose and why use it with MongoDB?
Mongoose is an Object Data Modeling (ODM) library for MongoDB and Node.js. It provides a schema-based solution to model your data, offering built-in validation, type casting, query building, and business logic hooks. While MongoDB is schema-less, Mongoose lets you define schemas for structure and validation. It simplifies common tasks, provides middleware for pre/post hooks, and makes complex queries more readable. Mongoose bridges the gap between the flexibility of MongoDB and the structure needs of applications. It makes working with MongoDB more intuitive and less error-prone.
Q122. How do you define a schema in Mongoose?
Create a schema using new mongoose.Schema() with an object defining field names, types, and options. For example: const userSchema = new mongoose.Schema({ name: { type: String, required: true }, email: { type: String, unique: true }, age: Number, createdAt: { type: Date, default: Date.now } }). Types include String, Number, Date, Boolean, ObjectId, Array, and more. Add validation with required, unique, min, max, etc. Schemas define the structure and rules for your documents. After defining a schema, create a model from it to interact with the database.
Q123. What is the difference between a Schema and a Model in Mongoose?
A Schema defines the structure, validation rules, and default values for documents – it’s a blueprint. A Model is a compiled version of the schema that provides an interface to the database. You define a schema first: const userSchema = new Schema({…}), then create a model: const User = mongoose.model(‘User’, userSchema). Models let you perform CRUD operations: User.find(), User.create(), etc. Think of the schema as the architectural plan and the model as the actual building constructed from that plan. You interact with models, not schemas directly.
Q124. How do you perform validation in Mongoose?
Mongoose provides built-in validators in your schema definition. Use required: true to make fields mandatory. Use min and max for numbers. Use minlength and maxlength for strings. Use enum to restrict values to a list. Use match for regex pattern matching. Create custom validators with validate: { validator: function(v) { return /* validation logic */ }, message: ‘Error message’ }. Validation runs automatically when you create or update documents. Catch validation errors in your code and send meaningful responses. Mongoose validation ensures data integrity at the application level.
Q125. What are Mongoose middleware (hooks)?
Middleware functions execute at specific stages of document lifecycle events. Pre-hooks run before an operation: userSchema.pre(‘save’, function(next) { /* do something */ next(); }). Post-hooks run after: userSchema.post(‘save’, function(doc) { /* do something */ }). Common hooks include save, validate, remove, find, and update operations. Use pre-save hooks for hashing passwords before storing them. Use post-find hooks for populating related data. Middleware lets you add custom logic to database operations without cluttering your route handlers, keeping code organized and reusable.
Q126. How do you create relationships in MongoDB using Mongoose?
MongoDB doesn’t have foreign keys like SQL, but you can create relationships using references or embedding. For references, use ObjectId type: createdBy: { type: mongoose.Schema.Types.ObjectId, ref: ‘User’ }. Then use populate() to retrieve related documents: Post.find().populate(‘createdBy’) replaces the ObjectId with the actual user document. Embedding directly stores related data: comments: [{ text: String, author: String }]. Use references for data accessed separately or shared across documents. Use embedding for data always accessed together and not shared. Choose based on your query patterns.
Q127. What is populate() in Mongoose?
The populate() method automatically replaces ObjectId references with the actual documents they reference. Instead of seeing just an ID, you get the full referenced document. For example, if a post document has author: userId, calling Post.findById(id).populate(‘author’) replaces the userId with the complete user document. You can populate multiple fields, populate nested references, and select specific fields to populate. It simplifies retrieving related data without writing separate queries. Populate is like SQL joins but happens at the application level rather than database level.
Q128. How do you handle pagination in MongoDB?
Implement pagination using skip() and limit() methods. Calculate skip value from page number and page size: const skip = (page – 1) * pageSize. Query with: Model.find().skip(skip).limit(pageSize). Also get total count: const total = await Model.countDocuments(). Send both results and total to calculate total pages on the frontend. For better performance on large datasets, use cursor-based pagination with _id or timestamp: Model.find({ _id: { $gt: lastSeenId } }).limit(pageSize). Skip-based pagination can be slow on large offsets because it still counts all skipped documents.
Q129. What are indexes in MongoDB and why are they important?
Indexes are data structures that improve query performance by creating ordered references to document fields. Without indexes, MongoDB scans every document (collection scan) for queries, which is slow. With indexes, it quickly locates matching documents. The _id field is indexed automatically. Create custom indexes on frequently queried fields: userSchema.index({ email: 1 }). Compound indexes include multiple fields. Indexes speed up reads but slow down writes slightly because they must be updated. Create indexes on fields used in queries, sorts, and joins. Use explain() to analyze query performance and identify needed indexes.
Q130. What is the aggregation pipeline in MongoDB?
The aggregation pipeline processes data through multiple stages, transforming and combining documents to produce computed results. Each stage performs an operation like filtering, grouping, sorting, or calculating. Common stages include $match (filter), $group (aggregate by field), $sort, $project (reshape documents), $lookup (join with other collections), and $limit. Stages execute in order, with each stage’s output becoming the next stage’s input. Use aggregation for complex analytics like calculating averages, totals, or generating reports. It’s more powerful than simple find queries for data analysi
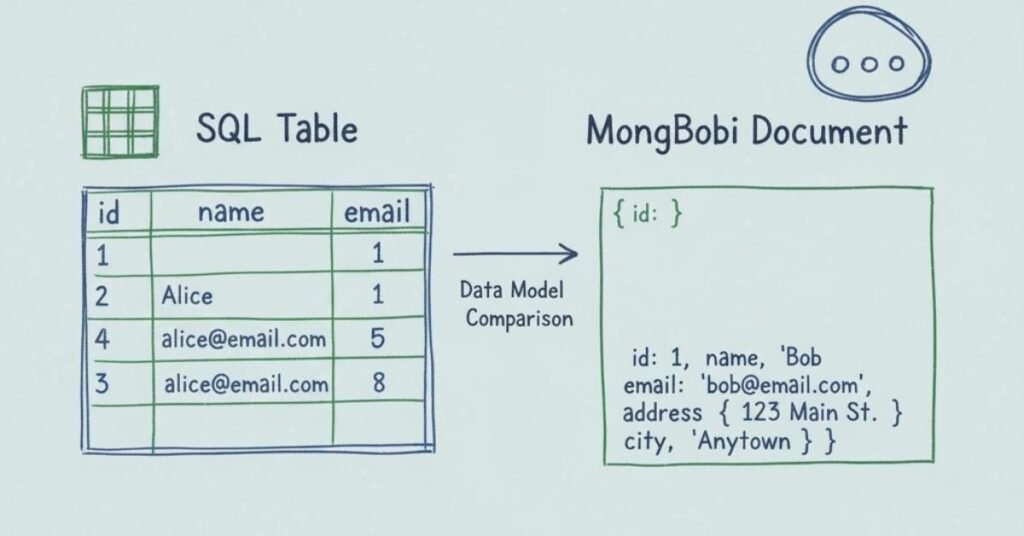
💼 More How To Guides for All Technologies →
Section 6: Authentication and Security
Authentication Mechanisms
Q131. What is JWT (JSON Web Token)?
JWT is a compact, URL-safe token format for securely transmitting information between parties. It consists of three parts: header (algorithm and token type), payload (claims/data), and signature (verifies token hasn’t been tampered). After successful login, the server generates a JWT containing user information, signs it with a secret key, and sends it to the client. The client includes this token in subsequent requests (usually in Authorization header). The server verifies the signature to ensure authenticity. JWTs are stateless – no database lookups needed – making them scalable and perfect for distributed systems.
Q132. How do you implement JWT authentication in a MERN stack app?
Install jsonwebtoken package. After verifying login credentials, generate a token: const token = jwt.sign({ userId: user._id }, process.env.JWT_SECRET, { expiresIn: ‘7d’ }). Send it to the client. Client stores it in localStorage or cookies and includes it in request headers: Authorization: Bearer ${token}. Create middleware to verify tokens: const decoded = jwt.verify(token, process.env.JWT_SECRET). Attach user info to the request object. Protect routes by applying this middleware. Handle expired or invalid tokens appropriately. Never store sensitive data in JWT payload as it’s readable. Use environment variables for secrets.
Q133. What is the difference between authentication and authorization?
Authentication verifies who you are – confirming identity through credentials like username and password. It answers “Are you really who you claim to be?”. Authorization determines what you can do – checking permissions after authentication. It answers “Are you allowed to access this resource?”. You might authenticate as John Doe, then authorization checks if John has permission to delete posts. Authentication happens first, authorization second. In MERN apps, JWT handles authentication, while role-based checks handle authorization. Both are essential for secure applications.
Q134. What is password hashing and why is it important?
Password hashing transforms passwords into fixed-length strings using one-way functions. You can’t reverse a hash to get the original password. When users register, hash their password before storing: const hashedPassword = await bcrypt.hash(password, 10). When logging in, hash the provided password and compare hashes: const match = await bcrypt.compare(password, hashedPassword). Never store plain-text passwords – if your database is compromised, all passwords are exposed. Hashing with salt (random data added before hashing) prevents rainbow table attacks. Use bcrypt or argon2 – algorithms designed to be slow, making brute-force attacks impractical.
Q135. What is bcrypt and how do you use it?
Bcrypt is a password hashing function designed to be computationally expensive, making brute-force attacks impractical. Install it with npm install bcrypt. Hash passwords: const hash = await bcrypt.hash(plainPassword, saltRounds) where saltRounds (typically 10-12) controls computation cost. Compare passwords: const isMatch = await bcrypt.compare(plainPassword, hashedPassword). Higher saltRounds means more secure but slower. Bcrypt automatically handles salting. Use it in pre-save middleware to hash passwords before storing users. It’s the industry standard for password hashing and significantly more secure than simple hashing algorithms like MD5 or SHA.
Q136. What is OAuth and how does it work?
OAuth is an open standard for authorization that lets users grant third-party applications access to their resources without sharing passwords. The flow: user clicks “Login with Google”, your app redirects to Google’s authorization server, user approves, Google redirects back with an authorization code, your app exchanges this code for an access token, use the token to fetch user data from Google’s API. The user never enters their Google password on your site. OAuth is commonly used for social logins. Implement it using passport.js in Node.js. It improves user experience and security by leveraging existing trusted accounts.
Authorization and Security
Q137. How do you implement role-based access control?
Store user roles in your user schema: role: { type: String, enum: [‘user’, ‘admin’, ‘moderator’], default: ‘user’ }. After JWT authentication, check roles in middleware: if (req.user.role !== ‘admin’) return res.status(403).json({ error: ‘Access denied’ }). Create reusable middleware for different roles: const requireAdmin = (req, res, next) => { /* check role */ }. Apply to routes: app.delete(‘/users/:id’, authenticate, requireAdmin, deleteUser). For complex permissions, use a permissions object listing what each role can do. Role-based access control ensures users only access resources they’re authorized for.
Q138. What are common security vulnerabilities in web applications?
SQL/NoSQL injection: malicious code in queries. Prevent with parameterized queries and input validation. Cross-Site Scripting (XSS): injecting malicious scripts. Prevent by sanitizing output and using Content Security Policy headers. Cross-Site Request Forgery (CSRF): unauthorized commands from trusted users. Prevent with CSRF tokens. Authentication issues: weak passwords, no rate limiting. Use strong password policies and bcrypt. Authorization issues: accessing resources without permission. Implement proper access controls. Sensitive data exposure: storing passwords in plain text. Hash passwords and encrypt sensitive data. Always validate input, use HTTPS, keep dependencies updated, and follow security best practices.
Q139. How do you sanitize and validate user input?
Never trust user input – always validate and sanitize. Use validation libraries like Joi or express-validator. Validate data types, lengths, formats: body(’email’).isEmail(), body(‘age’).isInt({ min: 0, max: 120 }). Sanitize by removing dangerous characters: body(‘name’).trim().escape(). Validate on both frontend (user experience) and backend (security). Use Mongoose schema validation as a second layer. For MongoDB queries, avoid directly using user input in queries to prevent injection. Parse and validate JSON inputs. Whitelist allowed values instead of blacklisting dangerous ones. Good validation prevents most security issues and data corruption.
Q140. What is HTTPS and why is it important?
HTTPS (HTTP Secure) encrypts communication between client and server using SSL/TLS. Without it, data travels as plain text – anyone on the network can read passwords, tokens, and sensitive information. HTTPS prevents man-in-the-middle attacks where attackers intercept and modify data. Modern browsers mark HTTP sites as “Not Secure”, harming user trust. Many APIs refuse to work with non-HTTPS sites. Search engines rank HTTPS sites higher. In production, always use HTTPS. Get free certificates from Let’s Encrypt. For MERN apps, configure HTTPS in your Node.js server or use a reverse proxy like Nginx. HTTPS is no longer optional – it’s a requirement.

Section 7: Real-time Communication
WebSocket Technology
Q141. What are WebSockets and when should you use them?
WebSockets create a persistent, two-way communication channel between client and server. Unlike HTTP where clients request and servers respond, WebSockets allow servers to push data to clients anytime. After the initial handshake, the connection stays open, enabling real-time data transfer with minimal overhead. Use WebSockets for chat applications, live notifications, collaborative editing, real-time gaming, live sports scores, or stock tickers. Don’t use them for simple request-response scenarios where HTTP is sufficient. WebSockets are perfect when you need instant updates without clients repeatedly polling the server.
Q142. What is Socket.io and how does it differ from native WebSockets?
Socket.io is a library that provides real-time, bidirectional communication. It uses WebSockets when available but falls back to HTTP long-polling if WebSockets aren’t supported, ensuring compatibility. Socket.io adds features WebSockets lack: automatic reconnection, room/namespace support for organizing connections, broadcasting to multiple clients, acknowledgments for message delivery, and middleware. It’s easier to use than raw WebSockets with a cleaner API. Native WebSockets are lower-level and more efficient but require more code for features Socket.io provides out-of-the-box. For most MERN applications, Socket.io is the practical choice.
Q143. How do you implement Socket.io in a MERN stack application?
Install Socket.io on the server: npm install socket.io. In your server file, integrate it with Express: const server = require(‘http’).createServer(app); const io = require(‘socket.io’)(server);. Listen for connections: io.on(‘connection’, (socket) => { console.log(‘User connected’); }). On the client, install socket.io-client and connect: import io from ‘socket.io-client’; const socket = io(‘http://localhost:5000’);. Emit events from client: socket.emit(‘message’, data). Listen on server: socket.on(‘message’, (data) => { /* handle */ }). Broadcast to others: socket.broadcast.emit(‘message’, data). Socket.io enables real-time features with minimal code.
Q144. What are rooms in Socket.io?
Rooms are arbitrary channels that sockets can join and leave, useful for organizing connections. For example, in a chat app, each conversation could be a room. Sockets join rooms: socket.join(‘room-name’). Emit to everyone in a room: io.to(‘room-name’).emit(‘message’, data). Leave rooms: socket.leave(‘room-name’). One socket can be in multiple rooms. Rooms are server-side only and private – clients don’t see room membership. Use rooms for private chats, game lobbies, team channels, or any scenario where you need to send messages to specific groups rather than all connected clients.
Q145. What is the difference between polling and WebSockets?
Polling is repeatedly sending HTTP requests at intervals to check for new data. Short polling sends requests frequently, causing server load and latency. Long polling holds requests open until data is available, then immediately sends another. Both waste bandwidth with repeated HTTP handshakes. WebSockets establish one persistent connection, keeping it open for bidirectional communication. Data transfers instantly with minimal overhead. WebSockets are more efficient, have lower latency, and use less bandwidth. Use polling only if WebSockets aren’t available. For real-time features, WebSockets (or Socket.io which uses them) are the modern, superior choice.
Section 8: Caching and Performance
Redis Integration
Q146. What is Redis and why use it?
Redis is an in-memory data structure store used as a database, cache, and message broker. It keeps data in RAM making operations extremely fast – microseconds instead of milliseconds. Redis supports various data structures: strings, hashes, lists, sets, sorted sets. Use Redis for caching frequently accessed data, session storage, real-time analytics, rate limiting, or pub/sub messaging. In MERN apps, cache database query results in Redis to avoid repeated MongoDB queries. This dramatically improves performance. Redis is essential for scaling applications because it reduces database load and speeds up response times.
Q147. What are the main data structures in Redis?
Strings store text or binary data, perfect for caching API responses or session tokens. Hashes store field-value pairs, great for objects like user profiles. Lists are ordered collections supporting push/pop operations, useful for queues or recent items. Sets are unordered unique collections, good for tags or followers. Sorted sets are sets with scores for ordering, perfect for leaderboards or priority queues. Bitmaps efficiently store binary data. HyperLogLogs approximate cardinality. Each structure has specific commands optimized for its use case. Choosing the right data structure improves performance and simplifies code.
Q148. How do you implement caching with Redis in Node.js?
Install redis client: npm install redis. Create a connection: const redis = require(‘redis’); const client = redis.createClient();. Set cache: await client.set(‘key’, JSON.stringify(data), { EX: 3600 }) where EX sets expiration in seconds. Get cache: const cached = await client.get(‘key’). A typical pattern: check Redis first, if hit return cached data, if miss query database, store in Redis, return data. Example: let products = await client.get(‘products’); if (!products) { products = await Product.find(); await client.set(‘products’, JSON.stringify(products), { EX: 3600 }); }. Always parse JSON when retrieving. Set appropriate expiration times based on how often data changes.
Q149. What caching strategies exist and when to use each?
Cache-aside: application checks cache first, queries database on miss, then updates cache. Best for read-heavy workloads. Write-through: write to cache and database simultaneously, ensuring consistency. Best when consistency is critical. Write-behind: write to cache immediately, database later asynchronously. Fastest writes but risks data loss. Time-based expiration: cached data expires after a time period. Good for data that changes periodically. Event-based invalidation: clear cache when data changes. Most consistent but complex. Choose based on your consistency requirements, write patterns, and acceptable staleness. Most MERN apps use cache-aside with time-based expiration for simplicity.
Q150. How do you handle cache invalidation?
Cache invalidation is challenging – there’s a saying “There are only two hard things in Computer Science: cache invalidation and naming things.” Options: time-based expiration where cache automatically expires after a duration, event-based where you delete cache when data changes, versioning where cache keys include version numbers, and manual where you explicitly clear cache. Implement delete on update: await Product.findByIdAndUpdate(id, updates); await client.del(‘products’);. For complex scenarios, use cache tags to group related caches and invalidate together. Balance between serving fresh data and reducing database load. Over-invalidating wastes cache benefits, under-invalidating serves stale data.
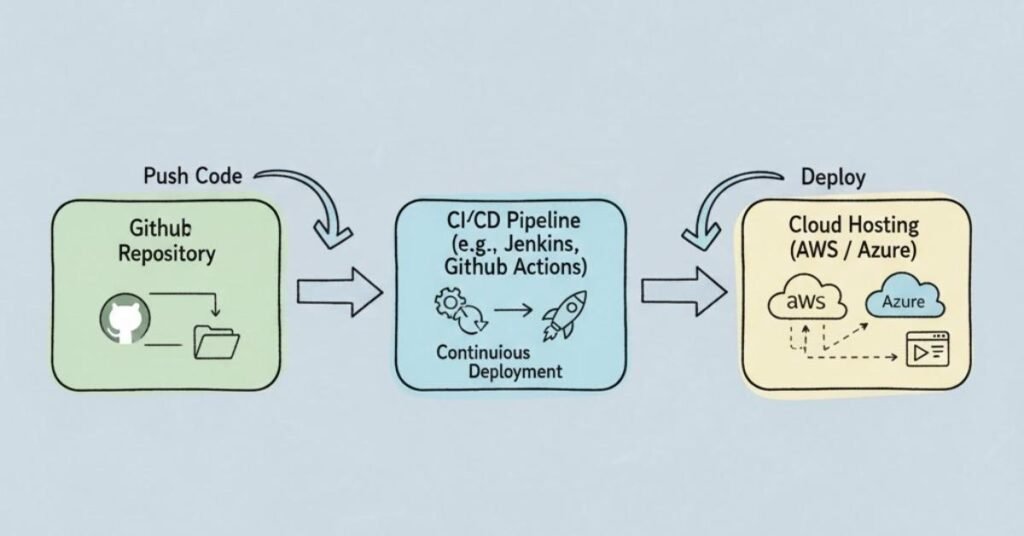
Section 9: Cloud and Deployment
Cloud Services
Q151. What is AWS and why use it for MERN applications?
AWS (Amazon Web Services) is a comprehensive cloud platform providing computing power, storage, databases, and more on demand. Instead of managing physical servers, you rent resources as needed. For MERN apps, use EC2 for hosting servers, S3 for file storage, RDS or DocumentDB for managed databases, CloudFront for CDN, and Route 53 for DNS. AWS benefits: scalability (handle traffic spikes), reliability (multiple data centers), pay-per-use pricing, global reach, and managed services reducing DevOps work. AWS is the largest cloud provider with extensive services, though Azure and GCP are alternatives. Most enterprises use cloud platforms for production deployments.
Q152. What is EC2 and how do you deploy a Node.js app on it?
EC2 (Elastic Compute Cloud) provides virtual servers in the cloud. Launch an EC2 instance (virtual machine) with your preferred OS, usually Ubuntu. Connect via SSH. Install Node.js, MongoDB, and dependencies. Clone your code from Git. Install packages with npm install. Use PM2 to keep your app running: pm2 start server.js. Configure security groups to allow HTTP/HTTPS traffic. Point your domain to the EC2 IP. For production, use a reverse proxy like Nginx, enable HTTPS with Let’s Encrypt, and set up environment variables. EC2 gives you full control like a physical server but in the cloud.
Q153. What is S3 and how do you use it for file uploads?
S3 (Simple Storage Service) is AWS’s object storage for files. It’s highly durable, scalable, and cost-effective for storing images, videos, backups, or static websites. Use the AWS SDK in Node.js: npm install aws-sdk. Configure with access keys. Upload files: s3.upload({ Bucket: ‘bucket-name’, Key: ‘filename’, Body: fileBuffer }). Get URLs to access files. Use presigned URLs for temporary access to private files. Configure buckets as public or private based on needs. S3 is cheaper and more scalable than storing files on your server’s disk. It’s the standard solution for file storage in cloud applications.
Q154. What is Infrastructure as a Service (IaaS)?
IaaS provides fundamental computing resources like virtual machines, storage, and networks on demand. You rent infrastructure but manage the operating system, runtime, and applications yourself. EC2 is an IaaS example. You choose the OS, install software, configure everything, and maintain it. IaaS offers flexibility and control but requires DevOps knowledge. Alternatives: Platform as a Service (PaaS) like Heroku manages infrastructure and runtime, you just deploy code. Serverless like AWS Lambda manages everything, you just write functions. Choose IaaS for control, PaaS for simplicity, serverless for automatic scaling. MERN apps work well with any approach.
Q155. What are environment variables and why are they important?
Environment variables store configuration that changes between environments (development, staging, production) like database URLs, API keys, and secrets. Never hardcode sensitive data or commit it to Git. In Node.js, access them via process.env.VARIABLE_NAME. Use dotenv package to load from .env files locally: require(‘dotenv’).config(). In production, set them through your hosting platform. Example .env: MONGODB_URI=mongodb://…, JWT_SECRET=randomstring. Add .env to .gitignore. Environment variables separate configuration from code, improving security and flexibility. They let you deploy the same code to multiple environments with different settings.
CI/CD and DevOps
Q156. What is CI/CD?
CI/CD stands for Continuous Integration and Continuous Deployment. CI is automatically testing and merging code changes frequently, catching bugs early. CD is automatically deploying code that passes tests to production. Instead of manual deployments, push code to Git and automation handles testing and deployment. This reduces errors, speeds up releases, and provides confidence through automated testing. Tools include GitHub Actions, GitLab CI, Jenkins, and CircleCI. A typical pipeline: commit code → run tests → build application → deploy to staging → run integration tests → deploy to production. CI/CD is essential for professional development, enabling rapid, reliable releases.
Q157. How do you set up GitHub Actions for a MERN app?
Create .github/workflows/deploy.yml in your repository. Define triggers, jobs, and steps. Example workflow: trigger on push to main branch, set up Node.js, install dependencies, run tests, build frontend, deploy to server. Use secrets for sensitive data like SSH keys or API tokens (Settings > Secrets). Steps use actions from the marketplace like actions/checkout for cloning code, actions/setup-node for Node.js. For deployment, SSH into your server and pull latest code, or use services like Heroku or Vercel with their actions. GitHub Actions automates your workflow, running tests and deployments automatically on every push.
Q158. What is PM2 and why use it?
PM2 is a production process manager for Node.js applications. It keeps your app running, automatically restarts on crashes, manages logs, and enables zero-downtime deployments. Start your app: pm2 start server.js. It runs in the background even after you close the terminal. View logs: pm2 logs. Monitor: pm2 monit. Auto-restart on file changes: pm2 start server.js –watch. Scale with clustering: pm2 start server.js -i max uses all CPU cores. Configure PM2 to start on system boot: pm2 startup. Without PM2, your app stops when the terminal closes or crashes occur. PM2 is essential for running Node.js in production.
Q159. How do you handle logs and monitoring in production?
Logging records application events, errors, and activities. Use logging libraries like Winston or Morgan. Log to files and external services like CloudWatch, LogRocket, or Papertrail. Include timestamps, severity levels, and contextual information. Never log sensitive data. Monitoring tracks application health, performance, and errors. Tools include New Relic, Datadog, or AWS CloudWatch. Set up alerts for critical errors or performance issues. Monitor CPU, memory, response times, error rates, and database performance. Good logging and monitoring help diagnose production issues quickly, understand user behavior, and maintain application health. They’re essential for professional applications.
Q160. What is the difference between development and production builds?
Development builds prioritize developer experience with source maps for debugging, hot reloading for instant updates, verbose error messages, and unminified code for readability. Production builds prioritize performance with minified/uglified code, removed console logs, optimized assets, environment variables for production, and disabled debugging features. For React, npm run build creates an optimized production build. Use environment checks: if (process.env.NODE_ENV === ‘production’) { /* production config */ }. Never use development builds in production – they’re larger, slower, and expose sensitive information. Always build specifically for each environment.
Section 10: Development Tools and Best Practices
Version Control
Q161. What is Git and why is it essential?
Git is a distributed version control system that tracks changes in your code over time. Every developer has a complete copy of the project history. Git enables collaboration – multiple people work on different features simultaneously without conflicts. You can revert to previous versions if something breaks, branch for experimental features, and merge changes systematically. GitHub, GitLab, and Bitbucket host Git repositories with additional collaboration features. Git is mandatory in professional development for code tracking, team collaboration, code review, and deployment. Learning Git is as important as learning to code itself.
Q162. Explain basic Git commands and workflow.
git init initializes a repository. git clone copies a remote repository. git add stages changes for commit. git commit -m “message” saves changes with a description. git push uploads commits to remote. git pull downloads changes from remote. git status shows current state. git log shows commit history. git branch lists branches, git checkout -b branch-name creates new branch. git merge combines branches. Typical workflow: pull latest changes, create feature branch, make changes, commit frequently with clear messages, push branch, create pull request for review, merge to main after approval. This workflow enables organized collaboration and maintains code quality.
Q163. What are Git branches and when should you use them?
Branches are separate lines of development. The main (or master) branch is typically the production-ready code. Create branches for new features, bug fixes, or experiments without affecting main. This allows multiple people to work simultaneously. Common strategies: feature branches for new features, hotfix branches for urgent fixes, release branches for preparing releases. Create branch: git checkout -b feature/user-auth. Work on it independently. When complete, merge back to main via pull request. Branches enable experimentation without risk, parallel development, and organized collaboration. They’re fundamental to team development.
Q164. What is a pull request and why use it?
A pull request (PR) is a request to merge your branch into another branch, typically into main. Instead of directly merging, you create a PR on platforms like GitHub. Team members review your code, suggest changes, discuss implementation, and approve or request modifications. PRs enable code review – catching bugs, ensuring standards, sharing knowledge, and maintaining quality. They create a record of why changes were made. Include descriptive titles, detailed descriptions, and link related issues. Good PR descriptions explain what changed and why, making reviews easier. PRs are essential for team development and code quality.
Q165. What is .gitignore and why is it important?
The .gitignore file specifies which files Git should ignore and not track. Essential for excluding node_modules (huge and downloaded from npm), .env files (contain secrets), build folders, logs, OS files like .DS_Store, and IDE configuration. Without .gitignore, your repository becomes bloated with unnecessary files and sensitive data could leak. Create it in your project root with patterns like node_modules/, *.log, .env. Use gitignore.io to generate templates for your stack. Always create .gitignore before your first commit. It keeps repositories clean, secure, and focused on source code.
Code Quality
Q166. What is clean code and why does it matter?
Clean code is code that’s easy to read, understand, and maintain. It uses descriptive names, follows consistent formatting, keeps functions small and focused, avoids unnecessary complexity, includes helpful comments, and follows established conventions. Clean code matters because you spend more time reading code than writing it. Readable code reduces bugs, eases onboarding, enables faster feature development, and simplifies debugging. Write code for humans, not just computers. Good developers optimize for maintainability. As Uncle Bob Martin says, “Clean code is code that has been taken care of.” Always leave code better than you found it.
Q167. What are ESLint and Prettier?
ESLint is a linter that analyzes code for potential errors, bugs, and style inconsistencies. It enforces coding standards, catches common mistakes before runtime, and maintains consistency across teams. Configure with .eslintrc file defining rules. Prettier is a code formatter that automatically formats code consistently – indentation, line length, quotes, etc. It removes style debates from code reviews. Use both together: ESLint for code quality rules, Prettier for formatting. Integrate them in your editor for real-time feedback and in CI/CD to enforce standards. They dramatically improve code quality and consistency with minimal effort.
Q168. What are Regular Expressions and common use cases?
Regular expressions (regex) are patterns for matching and manipulating text. Use them for validating emails: /^[\w-\.]+@([\w-]+\.)+[\w-]{2,4}$/, phone numbers, URLs, or extracting data from strings. In JavaScript, create regex with / pattern / or new RegExp(‘pattern’). Common methods: test() checks if pattern matches, match() extracts matches, replace() substitutes matches. Regex can be complex but powerful. Use them for validation in forms, parsing logs, extracting data, search and replace operations. Many libraries exist for common patterns. Don’t overuse – sometimes simple string methods are clearer.
Q169. How do you debug Node.js applications?
Use console.log() for quick debugging but remove before committing. Use the built-in debugger with node –inspect server.js then connect Chrome DevTools. Set breakpoints, step through code, and inspect variables. Use debugging statements: debugger; pauses execution when DevTools is attached. Read error stack traces carefully – they show exactly where errors occurred. Use try-catch blocks to catch and log errors properly. Tools like Winston help structure logging. For frontend React issues, use React Developer Tools browser extension. Learn to read error messages – they usually tell you exactly what’s wrong. Good debugging skills separate junior and senior developers.
Q170. What are code comments and best practices?
Comments explain why code does something, not what it does – the code itself shows what. Good: // Retrying failed requests up to 3 times to handle network instability. Bad: // loop through array. Use comments for complex logic, explaining business rules, documenting TODOs, or warning about gotchas. Don’t comment obvious code – it adds noise. Keep comments updated when code changes – outdated comments mislead. Use JSDoc for function documentation: parameter types, return types, descriptions. Comments are for future you and other developers. Balance: too few leaves confusion, too many creates clutter. Clear code needs fewer comments than unclear code.
Additional Technical Questions
DOM Manipulation
Q171. What is the DOM and how is it different from HTML?
The DOM (Document Object Model) is a programming interface for web documents. HTML is the markup language you write, while DOM is how the browser represents that HTML in memory as a tree of objects. When the browser parses your HTML, it creates the DOM – a live, structured representation where each element is a JavaScript object you can manipulate. Changing the DOM updates what users see instantly without reloading the page. The DOM lets JavaScript interact with and modify web pages dynamically. Understanding the DOM is crucial because React and other frameworks manipulate it to create interactive interfaces.
Q172. How do you select elements in JavaScript?
JavaScript provides several methods to select DOM elements. document.getElementById(‘id’) selects a single element by ID. document.querySelector(‘.class’) selects the first matching element using CSS selectors. document.querySelectorAll(‘.class’) selects all matching elements, returning a NodeList. Older methods include getElementsByClassName() and getElementsByTagName() which return live HTMLCollections. Use querySelector/querySelectorAll for flexibility since they accept any CSS selector. Store selected elements in variables to avoid repeatedly querying the DOM, which is slow. Modern frameworks like React abstract this away, but understanding DOM selection is fundamental.
Q173. What is event delegation and why is it useful?
Event delegation is attaching a single event listener to a parent element instead of individual listeners on each child. The event bubbles up from the clicked child to the parent where you handle it. Check `event.target` to identify which child was clicked. This is efficient because you create fewer listeners, it automatically handles dynamically added children, and uses less memory. For example, one listener on a `<ul>` handles clicks on all current and future `<li>` elements. Event delegation is a performance optimization that reduces memory usage and simplifies code when handling many similar elements.
Q174. Explain event bubbling and event capturing.
When an event occurs, it propagates through the DOM in phases. Capturing phase goes from window down to the target element. Target phase reaches the element where the event occurred. Bubbling phase goes from target back up to window. Most events bubble, meaning child events trigger parent listeners. You can stop propagation with event.stopPropagation(). By default, event listeners use the bubbling phase. Specify true as the third argument to addEventListener(‘click’, handler, true) to use capturing phase instead. Understanding event flow helps you manage complex interactions and implement event delegation effectively.
Q175. What is the difference between innerHTML, textContent, and innerText?
innerHTML gets or sets the HTML content including tags. It parses HTML, so it’s slower and poses XSS risks if you insert user input without sanitization. textContent gets or sets only the text content, stripping all HTML tags. It’s faster and safer. innerText is similar to textContent but considers styling – it only returns visible text, excluding hidden elements. It also triggers reflow, making it slowest. For simple text, use textContent. Use innerHTML only when you need to insert HTML markup, and always sanitize user input. For reading visible text, innerText works but is less performant.
React Performance
Q176. What causes unnecessary re-renders in React?
React components re-render when state changes, props change, or parent components re-render. Common causes of unnecessary re-renders: passing new object/array references as props on each render, not memoizing callbacks passed to child components, updating parent state when only child needs the data, using Context that changes frequently. Every state update triggers a re-render of that component and all children by default. To identify re-renders, use React DevTools Profiler. Fix them with React.memo for components, useMemo for expensive calculations, useCallback for functions, and proper state structure. Premature optimization is bad, but fixing obvious re-render issues improves performance significantly.
Q177. What is code splitting and why is it important?
Code splitting divides your bundle into smaller chunks that load on demand instead of loading the entire application upfront. This reduces initial load time dramatically. In React, use dynamic imports with `React.lazy()` and `Suspense`: `const Component = React.lazy(() => import(‘./Component’))`. Wrap lazy components in Suspense with a fallback: `<Suspense fallback={<Loading />}><Component /></Suspense>`. Route-based code splitting loads each page’s code only when users navigate there. Code splitting is critical for large applications – users shouldn’t download code for features they don’t use. It’s one of the most impactful performance optimizations.
Q178. What are React Portals and when should you use them?
Portals let you render children into a DOM node outside the parent component’s hierarchy. Useful for modals, tooltips, or dropdowns that need to break out of overflow-hidden containers or appear above other content. Create with ReactDOM.createPortal(child, domNode). Even though rendered elsewhere in the DOM, the portal component maintains its position in the React component tree for context and event bubbling. First, create a div with id “portal-root” in your HTML. Then render components there: ReactDOM.createPortal(<Modal />, document.getElementById(‘portal-root’)). Portals solve z-index and positioning issues elegantly.
Q179. What is React Suspense and how does it work?
Suspense is a React component that lets you display fallback content while waiting for something to load. It works with React.lazy for code splitting and data fetching libraries. Wrap lazy components in Suspense: `<Suspense fallback={<Spinner />}><LazyComponent /></Suspense>`. When LazyComponent starts loading, Suspense shows the spinner. When loading completes, it renders the actual component. You can have multiple Suspense boundaries at different levels for granular loading states. Suspense for data fetching is still evolving, but frameworks like Relay and React Query integrate with it. Suspense simplifies loading state management by handling it declaratively.
Q180. What is React Concurrent Mode?
Concurrent Mode (now called Concurrent Rendering) allows React to work on multiple tasks simultaneously and prioritize urgent updates. It can interrupt rendering work, handle high-priority updates first, then resume lower-priority work. This makes apps more responsive. Features include automatic batching, Transitions for marking updates as non-urgent with useTransition, and Suspense for data fetching. The transition hook lets you mark state updates as non-urgent: startTransition(() => setSearchQuery(value)). React 18 enabled concurrent features by default. Concurrent rendering improves perceived performance by keeping the UI responsive during heavy updates.
Advanced JavaScript
Q181. What is the this keyword in JavaScript?
The this keyword refers to the context in which a function is executed. In regular functions, this depends on how the function is called. In methods, this is the object before the dot. In standalone functions, this is undefined in strict mode or the global object otherwise. In arrow functions, this is inherited from the surrounding scope (lexical binding). In event handlers, this is the element that received the event. You can explicitly set this with call(), apply(), or bind(). Understanding this is crucial for React class components and event handlers, though arrow functions and hooks have simplified this considerably.
Q182. Explain the concept of pure functions.
A pure function always returns the same output for the same input and has no side effects. It doesn’t modify external variables, make API calls, or change the DOM. Example: const add = (a, b) => a + b is pure. const addRandom = (a) => a + Math.random() is impure because output varies. Pure functions are predictable, easy to test, and enable optimizations. React components should be pure – given the same props and state, they should render the same output. Reducers in Redux must be pure. Pure functions make code more reliable and easier to reason about. They’re a fundamental concept in functional programming.
Q183. What is function currying?
Currying transforms a function that takes multiple arguments into a sequence of functions that each take a single argument. Example: instead of add(a, b), you have add(a)(b). Implement it: const add = (a) => (b) => a + b. Use it: const add5 = add(5); add5(3); // returns 8. Currying enables partial application – creating specialized functions from general ones. It’s useful for creating reusable, configurable functions. For example, const multiplyBy = (multiplier) => (number) => number * multiplier lets you create multiplyBy2 or multiplyBy10. Currying makes functions more flexible and composable.
Q184. What are JavaScript Promises chaining?
Promise chaining is linking multiple asynchronous operations where each step depends on the previous one. Each .then() returns a new promise, allowing chaining: fetch(‘/api’).then(res => res.json()).then(data => process(data)).then(result => display(result)).catch(handleError). The value returned from one .then() becomes the input to the next. This avoids callback hell by flattening nested async operations. Always return promises in .then() to maintain the chain. Use one .catch() at the end to handle all errors in the chain. Promise chaining makes async code sequential and readable, though async/await is now preferred for even cleaner syntax.
Q185. What is the prototype chain in JavaScript?
JavaScript objects inherit properties and methods from their prototype. Every object has an internal [[Prototype]] link to another object. When you access a property, JavaScript first looks on the object itself. If not found, it checks the prototype, then the prototype’s prototype, up the chain until reaching null. This is the prototype chain. Example: arrays inherit methods like map() and filter() from Array.prototype. You can add methods to prototypes: Array.prototype.myMethod = function() {}. Understanding prototypes is key to JavaScript’s inheritance model. ES6 classes are syntactic sugar over prototypes. The prototype chain enables inheritance and shared methods efficiently.
MongoDB Advanced
Q186. What are transactions in MongoDB and when do you use them?
Transactions ensure multiple operations succeed or fail together, maintaining data consistency. Use transactions when operations across multiple documents or collections must be atomic – either all succeed or all fail. Example: transferring money between accounts requires debiting one account and crediting another atomically. Start a session, begin a transaction, perform operations, then commit or abort. MongoDB supports ACID transactions on replica sets. Example: session.startTransaction(); try { /* operations */ session.commitTransaction(); } catch { session.abortTransaction(); }. Transactions have performance costs, so use them only when necessary for data integrity. They’re essential for financial operations or any scenario requiring strong consistency.
Q187. What is sharding in MongoDB?
Sharding distributes data across multiple servers (shards) to handle large datasets and high throughput. A shard is a subset of data. A shard key determines how data is distributed. MongoDB routes queries to relevant shards. Use sharding when a single server can’t handle the load or data size. Benefits: horizontal scaling, improved read/write performance, no single point of failure. Challenges: increased complexity, careful shard key selection crucial. Choose shard keys with high cardinality and even distribution. Poor shard keys cause hotspots where one shard gets all the load. Sharding is for large-scale applications requiring massive scalability beyond single-server capabilities.
Q188. Explain the difference between embedding and referencing in MongoDB.
Embedding stores related data in a single document: { name: ‘John’, address: { city: ‘NYC’, zip: ‘10001’ } }. Referencing stores relationships using ObjectIds: { name: ‘John’, addressId: ObjectId(…) }. Embed when data is accessed together, relationships are one-to-few, or data doesn’t change often. Reference when data is accessed independently, relationships are one-to-many or many-to-many, or data is shared across documents. Embedding is faster (one query) but duplicates data. Referencing normalizes data but requires joins (populate). MongoDB favors embedding for performance. Choose based on query patterns – optimize for how you read data, not just how you store it.
Q189. What are MongoDB Change Streams?
Change Streams let you listen to real-time changes in your database, collections, or documents. When data changes (insert, update, delete), your application receives notifications. Use cases include syncing data to cache, triggering workflows, real-time analytics, or building reactive applications. Example: collection.watch().on(‘change’, (change) => { console.log(change); }). Change Streams work on replica sets and sharded clusters. They’re more reliable than triggers and provide ordering guarantees. Perfect for building real-time features without polling the database. Change Streams enable event-driven architectures where systems react to database changes automatically.
Q190. What is MongoDB Atlas and its benefits?
MongoDB Atlas is a fully managed cloud database service. It handles deployment, scaling, backups, monitoring, and security automatically. Benefits: no infrastructure management, automatic backups and point-in-time recovery, built-in monitoring and alerts, global clusters for low latency worldwide, free tier for development, easy scaling with a few clicks. It supports AWS, Azure, and Google Cloud. Atlas includes features like data encryption, network isolation, and compliance certifications. For production MERN apps, Atlas simplifies operations significantly compared to self-hosting. You focus on development while Atlas handles database operations. It’s the easiest way to run MongoDB in production.
API and Backend
Q191. What is REST API and its principles?
REST (Representational State Transfer) is an architectural style for designing networked applications. Principles: client-server separation, stateless (each request contains all needed information), cacheable responses, uniform interface (standard HTTP methods and URLs), layered system, and optionally code on demand. RESTful APIs use HTTP methods: GET retrieves data, POST creates, PUT updates, DELETE removes. URLs represent resources: /users, /users/123. Responses use standard HTTP status codes. REST is simple, scalable, and works with any language. Most MERN stack apps use RESTful APIs. It’s the most common API design approach, though GraphQL is an alternative gaining popularity.
Q192. What are HTTP status codes and what do they mean?
Status codes indicate request outcomes. 2xx means success: 200 OK (successful GET), 201 Created (successful POST), 204 No Content (successful DELETE). 3xx means redirection: 301 Moved Permanently, 302 Found (temporary redirect). 4xx means client errors: 400 Bad Request (invalid data), 401 Unauthorized (not authenticated), 403 Forbidden (not authorized), 404 Not Found, 422 Unprocessable Entity (validation failed), 429 Too Many Requests. 5xx means server errors: 500 Internal Server Error, 502 Bad Gateway, 503 Service Unavailable. Always return appropriate status codes – they help clients understand what happened and handle responses correctly.
Q193. What is API versioning and why is it important?
API versioning manages changes to your API without breaking existing clients. As requirements evolve, you need to add features or change behavior. Without versioning, updates break apps using your API. Versioning strategies: URL versioning (/api/v1/users), header versioning (Accept: application/vnd.myapp.v1+json), or query parameter (/users?version=1). URL versioning is simplest and most common. When making breaking changes, create a new version and maintain both temporarily. Gradually migrate clients to the new version. Eventually deprecate old versions with advance notice. Versioning enables evolution while maintaining backward compatibility, critical for public APIs or microservices.
Q194. What is rate limiting and how do you implement it?
Rate limiting restricts how many requests a client can make in a time period, preventing abuse and ensuring fair resource usage. Implement using middleware that tracks requests by IP or API key. Use Redis to store counters: increment on each request, check if limit exceeded, reset counter after time window. Popular packages: express-rate-limit, rate-limiter-flexible. Example: const limiter = rateLimit({ windowMs: 15 * 60 * 1000, max: 100 }); app.use(‘/api/’, limiter); allows 100 requests per 15 minutes. Return 429 status when limit exceeded. Rate limiting protects against DDoS attacks, prevents API abuse, and ensures service availability for all users.
Q195. What is the difference between PUT and PATCH HTTP methods?
Both update resources but differ in how. PUT replaces the entire resource – you send the complete updated object. If you omit fields, they’re removed or reset to defaults. PUT is idempotent – making the same request multiple times has the same effect. PATCH partially updates resources – you send only changed fields. It’s more efficient for large objects when changing few fields. Example: updating a user’s email. PUT requires sending name, email, age, etc. PATCH only sends email. Use PUT for complete replacements, PATCH for partial updates. Some APIs only support one. RESTful convention suggests PUT for full updates, PATCH for partial, but implementation varies.
Security
Q196. What is XSS (Cross-Site Scripting)?
XSS is injecting malicious scripts into web pages viewed by other users. Attackers insert JavaScript code that executes in victims’ browsers, potentially stealing cookies, session tokens, or personal information. Types: Stored XSS (saved in database), Reflected XSS (in URL parameters), DOM-based XSS (client-side manipulation). Prevention: sanitize user input, encode output, use Content Security Policy headers, never use dangerouslySetInnerHTML in React without sanitization, validate and escape all user-generated content. Libraries like DOMPurify sanitize HTML. React automatically escapes text, providing good default protection. XSS is one of the most common web vulnerabilities – always treat user input as untrusted.
Q197. What is SQL/NoSQL injection and how do you prevent it?
Injection attacks insert malicious code into queries. SQL injection manipulates SQL queries. NoSQL injection does the same for databases like MongoDB. Example: user input {$ne: null} in MongoDB could return all records. Prevention: use parameterized queries or ORMs like Mongoose that sanitize inputs automatically, validate input types, use whitelisting for allowed values, never build queries with string concatenation using user input, apply principle of least privilege (restrict database permissions). Mongoose schemas provide type validation. Always validate and sanitize on the backend – never trust client-side validation. Injection attacks can lead to data breaches or deletion, making prevention critical.
Q198. What is CSRF (Cross-Site Request Forgery)?
CSRF tricks authenticated users into performing unwanted actions. Attacker creates a malicious website with a form that submits to your site. If the user is logged in, their cookies are sent automatically, and the request succeeds. Example: a delete account request triggered by visiting a malicious page. Prevention: use CSRF tokens – random values included in forms and validated server-side, check the Referer header, use SameSite cookie attribute, require re-authentication for sensitive actions. For APIs, token-based auth (JWT in headers) isn’t vulnerable since cookies aren’t automatically sent. CSRF exploits browser’s automatic cookie sending. Always protect state-changing operations in cookie-based auth systems.
Q199. What are security headers and why are they important?
Security headers are HTTP response headers that enhance security. Content-Security-Policy prevents XSS by restricting script sources. X-Frame-Options prevents clickjacking. X-Content-Type-Options prevents MIME sniffing. Strict-Transport-Security enforces HTTPS. X-XSS-Protection enables browser XSS filters. Referrer-Policy controls referrer information. Set headers in Express: app.use(helmet()) using the helmet middleware which sets multiple security headers. Configure CSP carefully – too restrictive breaks functionality, too loose provides little protection. Security headers are defense-in-depth – additional layers protecting against common attacks. They’re easy to implement and significantly improve security with minimal performance cost.
Q200. What is the principle of least privilege?
The principle of least privilege means giving users, systems, or processes only the minimum access needed to perform their tasks. In databases, create separate users for different operations – read-only for analytics, limited permissions for application, full access only for admins. In APIs, implement role-based access control. Users shouldn’t access all endpoints. In systems, applications shouldn’t run as root. In code, limit scope of variables and exposure of functions. Benefits: limits damage from compromised accounts, prevents accidental changes, improves system security. Apply least privilege everywhere: database permissions, API access, system processes, and code design. It’s a fundamental security principle reducing risk from both attacks and mistakes.
Project Architecture
Q201. What is MVC architecture?
MVC (Model-View-Controller) separates application into three components. Model handles data and business logic – database queries, validation, business rules. View handles presentation – what users see and interact with. Controller handles input – receiving requests, calling model methods, selecting views. In MERN: MongoDB schemas are models, React components are views, Express routes are controllers. Benefits: separation of concerns, easier testing, multiple developers can work on different components simultaneously, changes to UI don’t affect business logic. MVC is one of many architectural patterns. Understanding separation of concerns improves code organization, maintainability, and scalability regardless of specific pattern used.
Q202. What is the difference between monolithic and microservices architecture?
Monolithic architecture builds the entire application as a single unit – one codebase, one database, deployed together. Simple for small apps but becomes difficult to scale and maintain as it grows. Microservices split functionality into small, independent services. Each service has its own database, can use different technologies, and is deployed independently. Benefits: services scale independently, teams work autonomously, technology flexibility, fault isolation. Challenges: increased complexity, network latency, data consistency across services. Start monolithic for simplicity. Move to microservices when specific parts need independent scaling or different teams own different features. The MERN stack works for both approaches.
Q203. What are environment configuration best practices?
Never hardcode configuration – use environment variables. Create .env files for local development but never commit them. Use different configurations for development, staging, and production. Store production secrets securely using services like AWS Secrets Manager or HashiCorp Vault. Validate environment variables on startup – fail fast if required config is missing. Document all required variables in README. Use default values for non-sensitive config. Group related variables with prefixes like DB_HOST, DB_PORT. In Docker, pass variables via docker-compose or Kubernetes config maps. Proper configuration management improves security, prevents errors, and enables easy deployment across environments.
Q204. How do you structure a MERN project?
Organize code logically for maintainability. Common structure: separate client and server folders. Server structure: routes (endpoint definitions), controllers (request handling logic), models (database schemas), middleware (authentication, validation, error handling), utils (helper functions), config (configuration files). Client structure: components (UI pieces), pages (route components), hooks (custom hooks), context (global state), services (API calls), utils (helper functions). Keep related files together. Don’t nest too deep. Use index files for cleaner imports. Consistent structure helps teams navigate code quickly. Good organization scales better as projects grow. Structure should reflect your mental model of the application.
Q205. What is a design pattern and why use them?
Design patterns are reusable solutions to common programming problems. They’re proven approaches refined over time. Examples: Singleton (one instance), Factory (object creation), Observer (pub-sub), Strategy (algorithm selection), Decorator (add functionality). In React: Higher-Order Components, Render Props, Custom Hooks are patterns. Patterns provide vocabulary for discussing solutions, prevent reinventing wheels, encode best practices, and make code more maintainable. However, don’t force patterns where they don’t fit – use them to solve actual problems, not as ends themselves. Understanding patterns improves design skills and code quality. They’re tools in your problem-solving toolkit.
2. SELF-PREPARATION PROMPTS (50 Prompts Total)
50 Self-Preparation Prompts Using ChatGPT
This section provides you with 50 ready-to-use prompts that you can copy and paste into ChatGPT to practice and deepen your understanding of MERN stack concepts. These prompts are designed to help you learn through practical examples, explanations, and hands-on coding exercises.
HTML & CSS Fundamentals (Prompts 1-5)
Prompt 1: HTML Structure and Semantic Elements
I’m preparing for a MERN stack interview. Can you explain semantic HTML elements with practical examples? Show me how to structure a blog post page using semantic tags like <header>, <nav>, <article>, <section>, and <footer>. Also explain why semantic HTML is important for SEO and accessibility.
Prompt 2: CSS Flexbox Layout
I need to understand CSS Flexbox for my interview. Create a complete guide with 5 practical examples: a navigation bar, a card layout, a centering technique, a responsive gallery, and a footer with equal-width columns. Explain each property like justify-content, align-items, and flex-direction with visual descriptions.
Prompt 3: CSS Grid System
Teach me CSS Grid by building a responsive dashboard layout. Show me how to create a sidebar, header, main content area, and footer using grid-template-areas. Include media queries to make it mobile-responsive. Explain the difference between Grid and Flexbox and when to use each.
Prompt 4: Responsive Design Techniques
I need to master responsive design for my MERN interview. Show me how to create a fully responsive website header that works on mobile, tablet, and desktop. Include HTML, CSS with mobile-first approach, media queries, and a hamburger menu. Explain viewport units, rem vs em, and responsive images.
Prompt 5: CSS Box Model Deep Dive
Explain the CSS Box Model in detail with visual examples. Show me how padding, margin, border, and content interact. Include examples of box-sizing: border-box vs content-box. Create a practical example where understanding the box model prevents layout bugs.
JavaScript Core Concepts (Prompts 6-15)
Prompt 6: JavaScript Data Types and Type Coercion
I’m interviewing for a MERN position. Explain all JavaScript data types with examples. Show me tricky type coercion scenarios that might come up in interviews, like why [] + [] and [] + {} give different results. Include best practices for type checking.
Prompt 7: Array Methods Mastery
Create a comprehensive guide to JavaScript array methods: map, filter, reduce, forEach, find, some, every, sort, and splice. For each method, provide 2-3 practical examples related to real MERN applications like filtering products, calculating totals, or transforming API data.
Prompt 8: JavaScript Closures with Examples
I need to understand closures for my interview. Explain closures with 5 progressively complex examples: a simple counter, a private variable pattern, a function factory, a module pattern, and how React hooks use closures. Include interview questions I might face about closures.
Prompt 9: Asynchronous JavaScript Patterns
Teach me asynchronous JavaScript from basics to advanced. Start with callbacks, then promises, then async/await. Show me how to handle multiple API calls in parallel and sequentially. Include error handling patterns and common pitfalls. Give me a practical example of fetching user data and their posts.
Prompt 10: JavaScript Event Loop Explained
Explain the JavaScript event loop like I’m preparing for a technical interview. Use diagrams (described in text), examples with setTimeout, promises, and microtasks vs macrotasks. Show me code examples where understanding the event loop helps predict output. Include common interview questions.
Prompt 11: ES6+ Features Comprehensive Guide
I need to know all important ES6+ features for my MERN interview: destructuring, spread operator, rest parameters, template literals, arrow functions, classes, modules, default parameters, and optional chaining. For each feature, show practical MERN stack use cases with code examples.
Prompt 12: JavaScript Objects and Prototypes
Explain JavaScript prototypes and prototypal inheritance. Show me how to create objects using object literals, constructor functions, and ES6 classes. Explain the prototype chain, Object.create(), and how inheritance works. Include examples of adding methods to prototypes.
Prompt 13: this Keyword in Different Contexts
The ‘this’ keyword confuses me. Explain how ‘this’ works in regular functions, arrow functions, object methods, class methods, and event handlers. Show me how to use call, apply, and bind. Include React-specific examples where understanding ‘this’ is crucial.
Prompt 14: JavaScript Modules and Import/Export
Explain JavaScript modules for a MERN stack project. Show me the difference between CommonJS (require/module.exports) and ES6 modules (import/export). Include examples of default exports, named exports, re-exporting, and organizing a real MERN project’s file structure.
Prompt 15: Error Handling Best Practices
Teach me error handling in JavaScript for production MERN applications. Show me try-catch blocks, promise error handling with .catch(), async/await error handling, and creating custom error classes. Include examples of handling API errors and validating user input.
React Development (Prompts 16-30)
Prompt 16: React Components from Scratch
I’m new to React. Teach me how to create functional components step-by-step. Build a UserCard component that displays user information with props. Then create a UserList component that renders multiple UserCards. Include prop validation and component composition best practices.
Prompt 17: React State Management with useState
Explain React useState hook with 10 practical examples: counter, toggle, form input, array manipulation, object state, multiple state variables, state from props, derived state, state callbacks, and lazy initialization. Include common mistakes and best practices.
Prompt 18: React useEffect Hook Mastery
I need to master useEffect for my interview. Explain the dependency array, cleanup functions, and common use cases: fetching data, subscribing to events, setting timers, updating document title, and localStorage synchronization. Show me examples of each with proper cleanup.
Prompt 19: Building Forms in React
Show me how to build controlled forms in React from basic to advanced. Start with a simple login form, then a registration form with multiple inputs, then add validation, error display, and submission handling. Include examples of handling checkboxes, radio buttons, and select dropdowns.
Prompt 20: React Router Implementation
Teach me React Router v6 for a multi-page MERN application. Show me how to set up routes, nested routes, protected routes, route parameters, query parameters, and programmatic navigation. Create a complete example with Home, About, Login, Dashboard, and User Profile pages.
Prompt 21: React Context API for State
I need to avoid prop drilling in my React app. Show me how to implement Context API with a complete example: create context, provide values, consume with useContext, and update context state. Build an AuthContext for managing user authentication across components.
Prompt 22: Custom Hooks Creation
Teach me how to create custom React hooks. Show me 5 useful custom hooks with full implementations: useFetch for API calls, useLocalStorage for persistent state, useDebounce for search inputs, useToggle for boolean state, and useWindowSize for responsive behavior.
Prompt 23: React Performance Optimization
I want to optimize my React app for interviews. Explain React.memo, useMemo, and useCallback with practical examples. Show me how to identify unnecessary re-renders and fix them. Include before/after code examples and when to use each optimization technique.
Prompt 24: React useReducer for Complex State
Explain when and how to use useReducer instead of useState. Show me a complete example of building a shopping cart with useReducer: add items, remove items, update quantities, and calculate totals. Explain actions, reducers, and dispatch pattern.
Prompt 25: React Hooks Rules and Best Practices
Teach me all the rules of React hooks and why they exist. Show me examples of correct and incorrect hook usage. Explain why hooks can’t be in conditionals, loops, or nested functions. Include ESLint rules and how to structure components following hooks best practices.
Prompt 26: React Component Lifecycle
Compare React class component lifecycle methods to hooks equivalents. Show me how componentDidMount, componentDidUpdate, and componentWillUnmount map to useEffect. Include practical examples of data fetching on mount, responding to prop changes, and cleanup on unmount.
Prompt 27: React Portals and Modals
Show me how to create a reusable Modal component using React Portals. Include opening/closing functionality, backdrop click handling, escape key support, focus trapping, and styling. Explain why portals are necessary and how they help with z-index issues.
Prompt 28: React Lists and Keys
Explain how to properly render lists in React. Show me examples of mapping over arrays, using keys correctly, handling empty lists, and optimizing list rendering. Include examples with products, todos, and user comments. Explain why array indexes as keys can cause bugs.
Prompt 29: React Error Boundaries
Teach me React error boundaries for handling errors in production. Show me how to create an ErrorBoundary component, catch errors, display fallback UI, and log errors. Include practical examples of wrapping components and handling async errors in useEffect.
Prompt 30: React TypeScript Integration
I need to use TypeScript with React for my interview. Show me how to type components, props, state, events, and hooks. Create examples of a typed Button component, a Form component with typed inputs, and custom hooks with TypeScript. Include best practices and common patterns.
📂 Access 100+ Free Study Resources →
Node.js and Express (Prompts 31-40)
Prompt 31: Building a REST API with Express
Teach me how to build a complete REST API for a blog application using Express. Include routes for posts (GET all, GET by ID, POST create, PUT update, DELETE). Show me proper route organization, middleware usage, error handling, and request validation. Include the full project structure.
Prompt 32: Express Middleware Deep Dive
Explain Express middleware in detail. Show me how to create custom middleware for logging, authentication, error handling, and request validation. Include examples of application-level, router-level, and error-handling middleware. Explain the next() function and middleware execution order.
Prompt 33: Authentication with JWT
Show me how to implement JWT authentication in a MERN app from scratch. Include user registration with password hashing using bcrypt, login with JWT generation, protected routes with JWT verification middleware, and refresh token implementation. Provide complete code examples.
Prompt 34: Node.js File Upload Handling
Teach me how to handle file uploads in a Node.js/Express application. Show me how to use Multer for single and multiple file uploads, validate file types and sizes, store files locally and on AWS S3, and send file URLs back to the frontend. Include complete examples.
Prompt 35: Node.js Environment Configuration
Show me how to properly manage environment variables in a Node.js application. Explain dotenv usage, different environments (development, staging, production), environment-specific configurations, and security best practices. Include examples of database URLs, API keys, and port configuration.
Prompt 36: Express Error Handling Patterns
Teach me professional error handling in Express applications. Show me how to create custom error classes, centralized error handling middleware, async error handling, validation errors, 404 handling, and production vs development error responses. Include a complete error handling strategy.
Prompt 37: API Validation with Joi/Express-Validator
Show me how to validate API requests in Express. Compare Joi and express-validator, then implement validation for a user registration endpoint (email, password, name). Include custom validation rules, error message formatting, and integration with routes. Provide complete working examples.
Prompt 38: Node.js Streams and File Processing
Explain Node.js streams for handling large files. Show me how to read large files without loading them entirely into memory, pipe streams, transform data, and handle stream errors. Include practical examples like CSV processing, video streaming, and file compression.
Prompt 39: Node.js Testing with Jest
Teach me how to test Node.js/Express APIs using Jest and Supertest. Show me how to test routes, mock database calls, test authentication, and achieve good code coverage. Include examples of unit tests, integration tests, and setting up test databases.
Prompt 40: Express Security Best Practices
Show me how to secure an Express API for production. Include Helmet for security headers, rate limiting with express-rate-limit, input sanitization, CORS configuration, SQL/NoSQL injection prevention, and XSS protection. Provide a complete security checklist with code examples.
MongoDB and Database (Prompts 41-45)
Prompt 41: MongoDB Schema Design
Teach me MongoDB schema design for a social media application. Show me how to model users, posts, comments, likes, and friendships. Explain when to embed vs reference, one-to-many and many-to-many relationships. Include Mongoose schemas with proper validation and relationships.
Prompt 42: Mongoose Queries and Population
Show me advanced Mongoose queries for a MERN application. Include filtering, sorting, pagination, text search, populate for relationships, and aggregation basics. Create examples of finding users by criteria, getting posts with author details, and implementing search functionality.
Prompt 43: MongoDB Aggregation Pipeline
Teach me MongoDB aggregation for analytics and reporting. Show me how to use $match, $group, $project, $sort, $lookup, and $unwind. Create practical examples: calculating total sales by category, finding top users, generating reports, and joining collections. Include step-by-step explanations.
Prompt 44: MongoDB Indexing for Performance
Explain MongoDB indexing for optimizing queries. Show me how to create single field indexes, compound indexes, and text indexes. Include examples of when indexes help, how to analyze query performance with explain(), and index best practices. Demonstrate before/after performance improvements.
Prompt 45: MongoDB Transactions
Teach me MongoDB transactions for maintaining data consistency. Show me a practical example of transferring points between users where both operations must succeed or fail together. Include session management, commit, abort, and error handling. Explain when transactions are necessary and their performance implications.
Full Stack Integration (Prompts 46-50)
Prompt 46: Complete MERN CRUD Application
Walk me through building a complete MERN stack CRUD application for managing tasks/todos. Include React frontend with forms and lists, Express API with all CRUD routes, MongoDB with Mongoose models, and connecting them together. Provide the complete project structure and code for each part.
Prompt 47: Real-time Chat with Socket.io
Show me how to build a real-time chat application using MERN stack and Socket.io. Include user connections, sending/receiving messages, typing indicators, online users list, and message history from MongoDB. Provide complete code for both server and client sides with explanations.
Prompt 48: Authentication Flow Frontend to Backend
Teach me the complete authentication flow in a MERN application. Show me registration (React form → Express API → MongoDB), login (credentials → JWT generation), storing tokens in localStorage, sending tokens with requests, protecting routes on frontend and backend, and logout. Include complete code examples.
Prompt 49: Deploying MERN Application
Show me how to deploy a complete MERN stack application to production. Include building the React frontend, serving it from Express, environment variables setup, MongoDB Atlas connection, deploying to Heroku/Railway/Render, setting up CI/CD, and troubleshooting common deployment issues.
Prompt 50: MERN Project Best Practices
Give me a comprehensive guide to MERN stack best practices for professional development. Include project structure, naming conventions, code organization, error handling patterns, security measures, API design, state management, testing strategy, and performance optimization. Provide a complete project template structure.
How to Use These Prompts Effectively
Best Practices for Learning
- Sequential Learning: Start with prompts 1-5 if you’re new to web development, then progress through JavaScript, React, backend, and finally full-stack integration.
- Hands-On Practice: Don’t just read the responses – type out the code examples yourself. Create your own variations and experiment.
- Deep Dive Sessions: Spend 30-60 minutes on each prompt. Take notes, create code snippets, and build small projects based on what you learn.
- Follow-Up Questions: After receiving an answer, ask follow-up questions like “Can you show me a more complex example?” or “What are common mistakes with this concept?”
- Build While Learning: Combine multiple prompts to build complete features. For example, use prompts 16, 17, 18, and 19 to build a complete form component.
- Interview Simulation: After studying a topic, ask ChatGPT: “Give me 5 interview questions about [topic] with detailed answers.”
- Code Review: Ask ChatGPT to review your code: “Here’s my implementation of [concept]. Can you review it and suggest improvements?”
- Debugging Help: When stuck, share your code and error: “I’m getting this error [paste error]. Here’s my code [paste code]. What’s wrong?”
Customization Tips
You can modify these prompts by adding:
- “Show me the complete code” for full implementations
- “Explain like I’m a beginner” for simpler explanations
- “Give me interview questions about this” for practice questions
- “Compare this with [alternative approach]” for deeper understanding
- “Show me common mistakes” to learn what to avoid
- “Include TypeScript examples” if using TypeScript
- “Make it production-ready” for real-world implementations
Creating Your Own Prompts
Based on the 50 prompts above, you can create additional prompts for topics like:
- Redux state management
- GraphQL with MERN
- Testing React components
- Docker containerization
- Microservices architecture
- Performance monitoring
- Caching strategies
- WebRTC integration
- Payment gateway integration
- Email service integration
Remember: The key to mastering MERN stack is consistent practice and building real projects. Use these prompts as your learning companion, but always apply concepts by building actual applications.
3.Communication Skills and Behavioural Interview Preparation
Communication Skills and Behavioural Interview Questions
In technical interviews, your ability to communicate effectively is just as important as your coding skills. This section prepares you for the non-technical aspects of interviews, including behavioural questions, communication strategies, and soft skills assessment.
Section A: Understanding Behavioural Interviews
What Are Behavioural Questions?
Behavioural interview questions ask about your past experiences to predict how you’ll perform in the future. Instead of hypothetical scenarios, interviewers want real examples from your work, projects, or academic experience. These questions usually start with phrases like “Tell me about a time when…” or “Describe a situation where…”
Interviewers use behavioural questions to assess your soft skills like teamwork, problem-solving, communication, leadership, adaptability, and work ethic. For MERN stack developers, they want to know how you handle technical challenges, work with teams, manage deadlines, and deal with conflicts.
The STAR Method
The STAR method is your framework for answering behavioural questions clearly and effectively. It stands for Situation, Task, Action, and Result.
Situation: Set the context. Describe the background of the situation briefly. Where were you working? What was happening? Keep this concise – just enough detail to understand the context.
Task: Explain the challenge or responsibility you faced. What needed to be accomplished? What was your role? What was at stake? This clarifies what you were working toward.
Action: Describe the specific steps you took to address the task. This is the most important part – focus on what YOU did, not what the team did. Use “I” statements. Be specific about your decisions, approach, and skills used.
Result: Share the outcomes of your actions. Quantify results when possible with numbers, percentages, or measurable improvements. What did you learn? What was the impact? End on a positive note even if the overall outcome wasn’t perfect – focus on lessons learned.
Example STAR Response
Question: “Tell me about a time you had to debug a complex issue in production.”
Situation: “In my last project, we launched an e-commerce website built with the MERN stack. Two days after launch, customers reported that their shopping carts were randomly emptying.”
Task: “As the lead frontend developer, I needed to identify and fix this critical bug quickly because it was affecting sales. We were losing approximately ten potential customers per hour.”
Action: “I first reproduced the issue locally by testing different user scenarios. I checked Redux DevTools and noticed the cart state was resetting unexpectedly. I reviewed recent commits and found that a team member had added a useEffect hook without proper dependencies, causing the cart to reset on every render. I fixed the dependency array, added proper memoization, and wrote unit tests to prevent similar issues. I also created documentation about proper useEffect usage for the team.”
Result: “The bug was resolved within three hours of being reported. We recovered customer confidence, and cart abandonment dropped by fifteen percent. The documentation I created helped prevent three similar bugs in the following months. This experience taught me the importance of code reviews and thorough testing before deployment.”
Section B: Common Behavioural Interview Questions with Sample Answers
Problem-Solving and Technical Challenges
Question 1: Tell me about the most challenging bug you’ve encountered and how you solved it.
Sample Answer: “While building a real-time chat application using Socket.io and React, users reported that messages were appearing multiple times. I systematically debugged by first checking the server logs, which showed single message emissions. Then I examined the React component and discovered that we had multiple socket connection instances being created due to improper useEffect cleanup. I implemented a cleanup function in useEffect to disconnect sockets properly and used useRef to maintain a single socket connection. I also added connection status indicators. This reduced duplicate messages by one hundred percent and improved user experience significantly. I learned the importance of properly managing side effects in React and always including cleanup functions.”
Question 2: Describe a situation where you had to learn a new technology quickly for a project.
Sample Answer: “My team was assigned to build a dashboard that required real-time data updates, but none of us had experience with WebSockets or Socket.io. I had just one week to learn and implement it. I started by reading the official Socket.io documentation and watching tutorial videos. I built a small proof-of-concept chat application to understand the concepts. I joined online communities and asked specific questions when stuck. Within five days, I successfully implemented real-time notifications for our dashboard. The feature worked smoothly and became one of the most appreciated aspects of the project. This experience taught me that I can learn new technologies quickly when motivated and that breaking down learning into small, practical projects is effective.”
Question 3: Tell me about a time when you disagreed with a technical decision. How did you handle it?
Sample Answer: “During a project planning meeting, my team lead suggested using Redux for state management in a relatively small application with only three pages. I believed Context API would be sufficient and would reduce complexity. Instead of directly opposing the decision, I prepared a comparison document showing the pros and cons of both approaches, including bundle size differences and development time estimates. I scheduled a one-on-one meeting with the lead and presented my research respectfully. I emphasized that I supported whatever decision was made but wanted to share my perspective. After reviewing the data, the lead agreed that Context API was more appropriate for our use case. We implemented it successfully, and the project finished two days ahead of schedule. I learned that disagreements should be backed by data and presented respectfully.”
Teamwork and Collaboration
Question 4: Describe a time when you had to work with a difficult team member.
Sample Answer: “In my previous project, I worked with a backend developer who rarely communicated and often missed meetings. This created integration issues between our frontend and his APIs. Instead of complaining to management, I approached him directly and asked if everything was okay. I learned he was working across multiple projects and felt overwhelmed. I suggested we have brief daily check-ins via Slack and documented our API contracts clearly using tools like Postman collections. I also offered to help prioritize tasks. These small changes improved our collaboration significantly. The project was completed successfully, and we actually became good friends. I learned that understanding someone’s situation and offering support is more effective than making assumptions.”
Question 5: Tell me about a time you mentored or helped a junior developer.
Sample Answer: “When a junior developer joined our team, she struggled with React hooks and async operations. Instead of just fixing her code, I scheduled weekly pair programming sessions where we worked through problems together. I explained concepts using simple analogies and encouraged her to ask questions without judgment. I created a shared document with common patterns and best practices. Within two months, her code quality improved dramatically, and she started helping other team members. She later told me that my mentorship approach made her confident in her abilities. This experience taught me that patient teaching and creating a safe learning environment helps people grow faster than criticism.”
Question 6: Describe a situation where you had to collaborate with non-technical stakeholders.
Sample Answer: “As a MERN developer, I worked on a client project where the business owner had specific requirements but no technical knowledge. She kept requesting features that weren’t technically feasible within the budget and timeline. I scheduled a meeting where I used simple analogies to explain technical constraints. For example, I compared adding features to building a house – you can’t add extra rooms without extending the budget and timeline. I created visual mockups showing what was possible versus what wasn’t. I also suggested alternative solutions that achieved her business goals within constraints. She appreciated the transparency and we agreed on a realistic scope. The project delivered on time with high client satisfaction. I learned that translating technical concepts into business language is crucial for managing expectations.”
Time Management and Prioritization
Question 7: Tell me about a time when you had to handle multiple urgent tasks simultaneously.
Sample Answer: “During a product launch week, I simultaneously faced a critical production bug, a feature deadline for the next release, and code review responsibilities. I immediately assessed priorities using the impact-urgency matrix. The production bug affected current users, so it took top priority. I communicated with stakeholders about potential delays on the feature. I fixed the critical bug within two hours by identifying a database connection leak in our Node.js server. Then I delegated some code reviews to senior team members and focused on completing the feature. I stayed two extra hours to ensure everything was completed. All three tasks were resolved successfully with minimal delay. I learned the importance of clear communication during high-pressure situations and not hesitating to ask for help.”
Question 8: Describe a situation where you missed a deadline. How did you handle it?
Sample Answer: “While building a user authentication system with JWT, I underestimated the complexity of implementing refresh tokens and secure cookie handling. Two days before the deadline, I realized I wouldn’t finish on time. Instead of staying quiet and hoping for the best, I immediately informed my project manager with complete transparency. I explained what was done, what remained, and provided a realistic timeline of three additional days. I offered to work over the weekend to minimize delay. I also outlined steps to prevent similar estimation errors in the future. The manager appreciated my honesty and transparency. I completed the feature within the revised timeline. This taught me to communicate problems early and that honesty builds trust more than hiding issues.”
Question 9: How do you prioritize tasks when everything seems important?
Sample Answer: “In my current role, I often face competing priorities. I use a systematic approach: First, I list all tasks and their deadlines. Second, I assess each task’s impact on users and business goals. Third, I consider dependencies – some tasks block others. Fourth, I communicate with stakeholders if priorities are unclear. For example, when I had to choose between optimizing page load speed and building a new feature, I analyzed user feedback showing slow pages were causing abandonment. I prioritized optimization first, which improved user retention by twenty percent. Then I built the feature. I also break large tasks into smaller chunks and tackle high-impact items first. I learned that not everything can be top priority and that data-driven prioritization leads to better outcomes.”
Adaptability and Learning
Question 10: Tell me about a time when project requirements changed significantly midway.
Sample Answer: “We were building an e-commerce site with client-side payment processing when our client suddenly required PCI compliance due to regulatory changes. This meant completely restructuring our payment flow to use server-side processing. Instead of resisting the change, I researched PCI compliance requirements and Stripe’s server-side integration. I proposed a solution using Stripe Elements for secure client-side card collection and server-side payment processing. I created a migration plan minimizing disruption to completed work. I led the team through the changes with clear documentation. We completed the revised system within an extended timeline, and the client appreciated our adaptability. The site launched successfully with full compliance. I learned that flexibility and quick learning are essential in web development because requirements often change.”
Question 11: Describe a time when you received constructive criticism. How did you respond?
Sample Answer: “During a code review, a senior developer pointed out that my React components had too many responsibilities and weren’t following the single responsibility principle. My initial reaction was defensive because I had worked hard on the code. However, I took time to objectively review his comments. I realized he was right – my components were difficult to test and reuse. I thanked him for the feedback and asked for examples of better patterns. I refactored my components into smaller, focused pieces. I also started studying component design patterns more seriously. This improved my code quality significantly, and I received positive feedback on subsequent reviews. I learned that criticism is a gift for growth when received with an open mind and that experienced developers can accelerate your learning.”
Question 12: Tell me about a time when you had to step outside your comfort zone.
Sample Answer: “As primarily a frontend developer, I was asked to create a complex MongoDB aggregation pipeline for generating analytics reports. I had limited backend experience and had never worked with aggregation. Initially, I felt intimidated, but I saw it as a learning opportunity. I spent evenings studying MongoDB aggregation documentation and online tutorials. I broke down the requirements into smaller queries and tested each stage. I reached out to backend developers for guidance when stuck. After a week of intense learning, I successfully implemented the pipeline, which generated reports thirty percent faster than the previous SQL-based approach. My manager was impressed with my initiative. This experience gave me confidence to tackle unfamiliar challenges and expanded my full-stack capabilities.”
Leadership and Initiative
Question 13: Describe a situation where you took initiative without being asked.
Sample Answer: “I noticed our team was repeatedly facing bugs related to improper API error handling in our React applications. Instead of just fixing individual cases, I took initiative to create a standardized error handling utility and custom hooks. I spent my personal time building an ErrorBoundary component, a useAPI custom hook with built-in error handling, and comprehensive documentation with examples. I presented it to the team during our weekly meeting. Everyone loved it, and we adopted it as a team standard. This reduced error-handling bugs by forty percent and made our codebase more consistent. My manager appreciated the initiative and it led to discussions about improving other shared utilities. I learned that proactively solving recurring problems benefits the entire team.”
Question 14: Tell me about a time when you had to make a difficult decision quickly.
Sample Answer: “During a live deployment, our MongoDB database started showing high CPU usage, causing the application to slow down significantly. Users were complaining, and I had to decide quickly whether to rollback the deployment or investigate and fix it live. I checked recent changes and suspected a missing index on a new query. I had two options: safe rollback with guaranteed downtime, or risky live index creation that might solve the issue immediately. I quickly analyzed the query and confirmed the missing index. I created the index on a read replica first to test, saw immediate improvement, then applied it to the primary. The application recovered within five minutes. I documented the incident and updated our deployment checklist to verify indexes before production releases. I learned to balance quick decision-making with calculated risk assessment.”
Question 15: Describe a time when you had to give difficult feedback to a peer.
Sample Answer: “A colleague frequently wrote code without following our team’s conventions, making pull reviews time-consuming. I needed to address this without damaging our relationship. I requested a private one-on-one meeting rather than calling him out publicly. I started by acknowledging his strong technical skills, then gently explained how inconsistent code style was affecting team productivity. I shared specific examples without being accusatory and asked if he was aware of our style guide. He admitted he had skipped reading it. I offered to pair program with him for a week to demonstrate our patterns. I also suggested setting up ESLint and Prettier to automate formatting. He appreciated the constructive approach and made immediate improvements. Our working relationship actually strengthened. I learned that difficult conversations are easier when approached with empathy and offering solutions rather than just criticism.”
Section C: Communication Skills for Technical Interviews
Explaining Technical Concepts Clearly
As a MERN stack developer, you must explain complex technical concepts to various audiences – fellow developers, project managers, clients, and stakeholders. Here’s how to communicate effectively:
Know Your Audience: Adjust your explanation based on who you’re talking to. With developers, use technical terms freely. With non-technical stakeholders, use analogies and avoid jargon. For example, explaining state management to a client: “Think of state like a whiteboard that multiple people can see and update. When one person changes something, everyone else sees the new information immediately.”
Use the Top-Down Approach: Start with the big picture, then dive into details. For instance, explaining a MERN application: “We’re building a web application with four main parts: MongoDB stores our data, Express handles server logic, React creates the user interface, and Node.js runs everything on the server. Let me explain each component’s role…”
Employ Analogies: Complex technical concepts become clearer with real-world comparisons. JWT authentication is like a movie ticket – it proves you paid for entry and grants access. React components are like LEGO blocks – small reusable pieces that combine to build complex structures. The event loop is like a restaurant server taking orders, delivering them to the kitchen, and serving food when ready.
Structure Your Explanations: Follow a logical flow – define the problem first, explain why it matters, describe your solution, and mention alternatives. When explaining why you chose MongoDB over PostgreSQL for a project, discuss requirements first (flexible schema, document storage), then your reasoning, then acknowledge tradeoffs.
Practice Active Listening: Before answering questions, ensure you understand what’s being asked. Paraphrase the question back: “So you’re asking how we handle authentication in our application, correct?” This prevents misunderstandings and shows respect for the questioner.
Handling Technical Questions You Don’t Know
Not knowing every answer is perfectly acceptable. What matters is how you handle uncertainty.
Be Honest: Never pretend to know something you don’t. Say “That’s a great question. I haven’t worked with that specific technology yet” or “I’m not completely certain, but here’s what I understand…” Honesty builds trust and shows intellectual humility.
Show Your Thinking Process: Even without the exact answer, demonstrate how you’d find it. “I haven’t used GraphQL subscriptions, but based on my understanding of GraphQL and WebSockets, I imagine subscriptions maintain persistent connections for real-time updates. I would research the official documentation and build a proof-of-concept to learn properly.”
Relate to What You Know: Connect unknown concepts to familiar ones. “I haven’t used Redis specifically, but I understand it’s an in-memory data store similar to caching mechanisms I’ve implemented with localStorage. I’d be interested in learning how Redis handles distributed systems and data persistence.”
Express Enthusiasm to Learn: Show genuine interest in filling knowledge gaps. “I haven’t worked with Docker containerization yet, but it’s on my learning list. I understand containers solve environment consistency issues. Could you tell me more about how your team uses it?”
Follow Up: If appropriate, mention you’ll research the topic after the interview. Some candidates even send follow-up emails with insights they discovered, demonstrating proactive learning.
Body Language and Non-Verbal Communication
Your non-verbal communication is as important as your words, especially in video interviews.
Maintain Eye Contact: In person, look at the interviewer while speaking and listening. In video calls, look at the camera when speaking to simulate eye contact, and watch the screen when listening. This shows confidence and engagement.
Sit Up Straight: Good posture conveys confidence and professionalism. Avoid slouching or leaning too far back. Position yourself comfortably but attentively.
Use Hand Gestures: Natural gestures while explaining technical concepts make you more engaging. Drawing in the air or using hands to show relationships between components helps communicate ideas. Just don’t overdo it – excessive gesturing is distracting.
Smile Genuinely: Authentic smiles create positive rapport. Smile when greeting interviewers, when discussing projects you’re passionate about, and when appropriate during conversation. It shows enthusiasm and friendliness.
Nod to Show Understanding: Small nods while the interviewer speaks show you’re actively listening and following along. This encourages them to continue and creates better conversational flow.
Avoid Nervous Habits: Be aware of fidgeting, playing with hair, touching your face, or clicking pens. These signal nervousness and distract from your message. If you tend to fidget, keep your hands folded or hold a pen gently.
Mirror Subtly: Unconsciously mirroring the interviewer’s energy level and body language builds rapport. If they lean forward, you might lean in slightly. If they’re relaxed, avoid being too stiff. Don’t mimic obviously – just match their general energy.
Virtual Interview Best Practices
Most MERN stack interviews happen remotely. Master virtual communication to stand out.
Technical Setup: Test everything beforehand. Ensure your camera works and is positioned at eye level. Check audio quality – use headphones to prevent echo. Test your internet connection and close unnecessary applications. Have the interviewer’s phone number ready in case of technical issues.
Environment: Choose a quiet, well-lit space with a neutral background. Natural light from windows is ideal. Ensure no one will interrupt you. Remove distractions from your background. Some developers use virtual backgrounds showing code or tech themes, but plain walls work fine too.
Professional Appearance: Dress professionally even for video calls. This shows respect and helps you feel confident. Dress as you would for in-person interviews – at least business casual for most tech companies.
Screen Sharing: If demonstrating code, prepare beforehand. Increase font sizes so code is easily readable. Close private tabs and notifications. Know how to share screens quickly. Practice walking through your projects smoothly.
Engagement: Look engaged throughout. Avoid looking at other screens or phones. Take notes visibly to show you’re attentive. If you need to look something up, ask permission first: “Would you mind if I quickly reference my project documentation?”
Speaking Pace: Speak slightly slower than usual since audio quality varies. Pause after important points. Check for understanding: “Does that answer your question?” Encourage interaction rather than monologuing.
Section D: Common Communication-Based Questions
Question 16: How would you explain React hooks to someone who only knows class components?
Sample Answer: “I’d start by acknowledging their class component knowledge as a foundation. I’d explain that hooks are special functions that let you use React features like state and lifecycle in functional components. I’d show a simple comparison – a class component with state and componentDidMount versus the same component as a function with useState and useEffect. I’d emphasize that hooks solve problems like hard-to-reuse stateful logic and complex lifecycle methods. I’d demonstrate how custom hooks enable code reuse better than HOCs or render props. I’d use visual diagrams if possible and encourage questions throughout. I’d also mention that hooks don’t replace classes immediately – both approaches work, but hooks are the recommended modern approach for new code.”
Question 17: How do you handle disagreements during code reviews?
Sample Answer: “I approach code review disagreements as learning opportunities rather than conflicts. If someone suggests changes I disagree with, I first ensure I fully understand their reasoning by asking clarifying questions. Often, they have insights I missed. If I still disagree, I present my perspective with specific reasons and examples, not just opinions. I focus on the code, never the person – saying ‘This approach might cause issues’ rather than ‘Your code is wrong.’ I’m always willing to discuss alternatives and compromise. If we can’t agree, I suggest getting a third opinion from another team member. I’ve learned that the best solution often combines ideas from both parties. What matters most is code quality and team harmony, not being right.”
Question 18: Describe how you would onboard a new team member to your codebase.
Sample Answer: “I’d create a structured onboarding plan. First, I’d schedule time to personally meet them and understand their background and learning style. I’d provide documentation covering architecture, coding standards, and development environment setup. I’d assign them a simple first task to get familiar with the codebase – maybe fixing a small bug or adding a minor feature. I’d make myself available for questions without hovering. I’d schedule daily check-ins for the first week, then weekly afterwards. I’d introduce them to the team and our communication channels. I’d do pair programming sessions showing how we work. I’d encourage them to document anything unclear – if it confused them, we should improve our docs. I’d celebrate their first merged pull request to build confidence. Good onboarding creates productive, happy team members.”
Question 19: How do you communicate progress on long-term projects?
Sample Answer: “I believe in transparent, regular communication. I break projects into measurable milestones and communicate progress at each milestone. I use project management tools like Jira or Trello to maintain visible status updates. I provide weekly summaries to stakeholders highlighting completed work, current focus, and upcoming tasks. I include both successes and challenges – if I’m blocked or behind schedule, I communicate early with proposed solutions. I use visual progress indicators like completion percentages or burndown charts. For technical stakeholders, I share more details about implementation. For business stakeholders, I focus on features and timeline. I schedule regular demos showing working functionality rather than just reporting status. I’ve learned that over-communication is better than under-communication, and early problem disclosure prevents last-minute surprises.”
Question 20: Tell me about a time you had to explain a technical failure to non-technical stakeholders.
Sample Answer: “Our production database experienced downtime during business hours, affecting customer access. I had to explain this to our non-technical CEO and clients. Instead of using technical terms like ‘connection pool exhaustion’ or ‘database queries,’ I used simple language: ‘Our data storage system received more requests than it could handle simultaneously, like too many people trying to enter a store through one door.’ I explained what we did to fix it: ‘We increased capacity and added a queueing system to manage traffic better.’ I outlined prevention steps: ‘We implemented better monitoring to catch issues before they affect customers.’ I was honest about the impact and apologized sincerely. I provided a timeline for complete resolution. I learned that transparency, simple language, and focusing on solutions rather than technical details helps maintain stakeholder confidence during crises.”
Section E: Questions to Ask Interviewers
Asking thoughtful questions shows genuine interest and helps you evaluate if the role fits your goals. Prepare several questions across these categories:
About the Team and Culture
- What does a typical day look like for someone in this role?
- How is the development team structured? How many frontend, backend, and full-stack developers are there?
- How does your team handle code reviews and knowledge sharing?
- What’s the balance between collaborative work and independent projects?
- How do you foster professional development and learning?
- What are the biggest challenges the team is currently facing?
About the Technology and Projects
- What is the current technology stack, and are there plans to adopt new technologies?
- Can you tell me about a recent project the team completed and what made it successful?
- How do you handle technical debt and refactoring?
- What development methodologies do you follow – Agile, Scrum, Kanban?
- How do you ensure code quality and test coverage?
- What does your deployment process look like?
About Growth and Expectations
- What would success look like in this role after six months? One year?
- What opportunities exist for career advancement?
- How do you support ongoing learning and skill development?
- What are the most important skills for someone to develop in this position?
- How do you handle work-life balance, especially during critical deployments or deadlines?
About the Company
- What excites you most about the company’s direction?
- How has the company grown or evolved recently?
- What are the company’s biggest priorities for the next year?
- How does this role contribute to company objectives?
Smart Follow-Up Questions
After receiving answers, ask thoughtful follow-ups that reference earlier conversation points. This demonstrates active listening and genuine engagement. For example, “You mentioned earlier that the team is transitioning to microservices. How far along is that transition, and would I be involved in that work?”
4. ADDITIONAL PREPARATION ELEMENTS
Additional Preparation Elements
This final section covers essential preparation elements beyond technical knowledge and communication skills. These strategies will help you present yourself professionally, practice effectively, and maximize your chances of landing your dream MERN stack developer role.
Section A: Building Your Portfolio and Resume
Creating an Outstanding MERN Stack Portfolio
Your portfolio is your professional showcase that demonstrates your capabilities to potential employers. A strong portfolio can set you apart from other candidates with similar qualifications.
Portfolio Website Essentials: Build your portfolio using the MERN stack itself to demonstrate your skills. Your portfolio should load quickly, be fully responsive, and showcase clean, modern design. Include a homepage with a brief introduction, an about section highlighting your journey and skills, a projects section with detailed case studies, a skills section with technology logos, a contact form connected to your backend, and links to your GitHub and LinkedIn profiles.
Project Selection Strategy: Quality matters more than quantity. Include three to five well-executed projects rather than ten mediocre ones. Choose projects that demonstrate different aspects of MERN development. For example, include one project showcasing complex state management with Redux, another demonstrating real-time features with Socket.io, and one highlighting RESTful API design and database optimization. Ensure at least one project solves a real-world problem rather than being a tutorial clone.
Project Presentation Best Practices: For each project, create a dedicated page or section with a compelling project title and one-sentence description, a hero image or gif demonstrating key functionality, a problem statement explaining what challenge you solved, your solution approach and architecture decisions, technologies used with specific versions, key features highlighted with screenshots or video demos, challenges faced and how you overcame them, live demo link and GitHub repository link, and future enhancements you plan to implement.
GitHub Profile Optimization: Your GitHub profile is an extension of your portfolio. Pin your best MERN stack repositories to your profile. Write detailed README files for each project including project description, installation instructions, environment variable setup, API documentation, screenshots or gifs, technology stack, and acknowledgments. Maintain clean commit history with meaningful commit messages. Contribute to open-source projects when possible. Keep your contribution graph active by coding regularly. Add topics and tags to repositories for better discoverability.
Standout Portfolio Projects: Consider building projects like a real-time collaboration tool with multiple users editing simultaneously, an e-commerce platform with payment integration and admin dashboard, a social media clone with authentication and real-time notifications, a task management application with drag-and-drop functionality, a video streaming platform with user uploads and comments, a chat application with private and group messaging, or a blog platform with markdown support and SEO optimization.
Crafting a Compelling Resume
Your resume is often your first impression with recruiters and hiring managers. A well-crafted resume increases your interview chances significantly.
Resume Structure for MERN Developers: Keep your resume to one or two pages maximum. Use a clean, professional layout with consistent formatting. Include these sections in order: header with name and contact information, professional summary or objective, technical skills organized by category, professional experience or projects, education, and optional sections like certifications or awards.
Professional Summary That Captures Attention: Write a three to four sentence summary at the top highlighting your expertise and value proposition. For example: “Full-stack MERN developer with two years of experience building scalable web applications. Proficient in React, Node.js, Express, and MongoDB with a strong foundation in RESTful API design and responsive UI development. Delivered five production applications serving over ten thousand users with ninety-nine percent uptime. Passionate about clean code, performance optimization, and continuous learning.”
Skills Section Strategy: Organize skills into clear categories like Frontend Development listing React, Redux, JavaScript ES6+, HTML5, CSS3, Tailwind CSS, and Responsive Design. Backend Development showing Node.js, Express.js, RESTful APIs, JWT Authentication, and WebSockets. Database Management including MongoDB, Mongoose, MySQL, and Database Design. Tools and Technologies covering Git, GitHub, VS Code, Postman, npm, and AWS. Soft Skills highlighting Problem Solving, Team Collaboration, Agile Methodology, and Communication.
Project Descriptions That Stand Out: For each project, use the CAR format – Challenge, Action, Result. Start with a strong action verb and quantify results when possible. For example: “Developed a real-time chat application using MERN stack and Socket.io, supporting simultaneous connections for five hundred users with sub-second message delivery. Implemented JWT authentication, message encryption, and emoji support. Reduced server costs by thirty percent through efficient database indexing and caching strategies.”
Quantifying Your Impact: Numbers make your achievements concrete and memorable. Instead of saying “Built a fast application,” say “Reduced page load time from five seconds to one point two seconds, improving user retention by twenty-five percent.” Instead of “Worked on authentication,” say “Implemented JWT-based authentication system securing API endpoints for fifteen thousand active users.” Always include metrics like number of users, performance improvements, cost savings, time reductions, or business impact.
ATS Optimization: Many companies use Applicant Tracking Systems to filter resumes before human review. To pass ATS screening, use standard section headings, incorporate relevant keywords from job descriptions, save your resume as a PDF and plain text version, avoid complex formatting, tables, or graphics in main sections, use standard fonts, spell out acronyms at least once, and match your skills section with job requirements.
✍️ Improve Your Resume with Expert How-To Guides →
Section B: Coding Practice and Technical Preparation
Essential Coding Practice Platforms
Consistent practice on coding platforms builds problem-solving skills and prepares you for technical assessments.
LeetCode for Algorithm Practice: Start with easy problems and gradually progress to medium difficulty. Focus on data structures commonly used in JavaScript: arrays, objects, sets, maps, linked lists, trees, and graphs. Practice at least one problem daily. Join LeetCode contests to simulate interview pressure. Popular MERN-relevant topics include array manipulation, string processing, hash maps and objects, recursion and backtracking, dynamic programming basics, and tree and graph traversal.
HackerRank for Domain-Specific Skills: Complete JavaScript, React, Node.js, and SQL certification tracks. Practice problems are organized by difficulty and domain. HackerRank’s interview preparation kit covers common interview patterns. The platform closely mimics actual technical assessment environments used by companies.
CodeSignal for Real Interview Simulation: CodeSignal’s interview practice mode simulates real coding interviews with time limits and multiple test cases. Companies like Uber and Zoom use CodeSignal for technical screening. Practice arcade mode to build speed and accuracy. Focus on writing clean, efficient code that passes all test cases.
MERN-Specific Practice: Build mini-projects focusing on specific features. Create a CRUD application in two hours. Build a user authentication system from scratch. Implement infinite scroll with pagination. Create a real-time notification system. Build a file upload feature with progress tracking. These practical exercises prepare you better than algorithm problems alone for MERN interviews.
Common Coding Challenge Patterns
Understanding common patterns helps you recognize and solve problems faster during interviews.
Component Building Challenges: You might be asked to build React components like an autocomplete search box with debouncing, a modal component with accessibility features, a multi-step form with validation, an image carousel with keyboard navigation, a dropdown menu with keyboard support, a data table with sorting and filtering, or a tabs component with dynamic content loading.
API Integration Tasks: Common challenges include fetching and displaying data from public APIs, implementing pagination with load more or infinite scroll, handling loading states and error states, implementing optimistic UI updates, managing global state with Context or Redux, implementing search with debouncing, and caching API responses to reduce requests.
Backend Coding Challenges: You may need to design and implement a RESTful API for a resource, implement user authentication with JWT, create middleware for request validation and authentication, design a database schema for a given scenario, implement file upload handling, create rate limiting middleware, optimize slow database queries, or implement error handling and logging.
Full-Stack Integration Tasks: Real-world challenges often involve building a complete feature end-to-end, like a user registration and login flow, a commenting system with real-time updates, a shopping cart with checkout, a file sharing feature with access controls, a notification system with email integration, or a dashboard with data visualization.
Section C: System Design Preparation
Understanding System Design Interviews
System design questions assess your ability to architect scalable, maintainable applications. While junior positions may not have extensive system design rounds, being prepared demonstrates maturity and forward-thinking.
What Interviewers Look For: They evaluate your ability to gather requirements and ask clarifying questions, break down complex problems into manageable components, make informed trade-offs between different approaches, consider scalability and performance, think about security and data integrity, communicate your thought process clearly, and adapt your design based on feedback.
Common System Design Questions for MERN Developers: You might be asked to design a URL shortening service like Bitly, a real-time chat application like Slack, a social media feed like Twitter, a file storage service like Dropbox, an e-commerce platform like Amazon, a video streaming service like YouTube, a ride-sharing application like Uber, or a collaborative document editor like Google Docs.
System Design Approach Framework: Follow this structure when tackling design questions. First, clarify requirements by asking about scale (how many users), features (what functionality is needed), constraints (technology stack, timeline, budget), and performance requirements (latency, availability). Second, define high-level design with client layer, API layer, application layer, data layer, and external services. Third, design the database schema choosing between SQL and NoSQL, defining entities and relationships, considering indexing strategy, and planning for data partitioning if needed. Fourth, design the API endpoints listing all endpoints, defining request and response formats, considering authentication requirements, and planning rate limiting. Fifth, consider scalability through load balancing, caching strategy, database replication and sharding, CDN for static assets, and asynchronous processing for heavy tasks.
MERN-Specific Architecture Patterns: Demonstrate knowledge of three-tier architecture separating presentation, application, and data layers. Microservices architecture for large applications with independent services. Serverless architecture using AWS Lambda for specific functions. JAMstack architecture for content-heavy sites. Component-based architecture for React frontends. RESTful API design principles. Event-driven architecture for real-time features.
Section D: Interview Day Preparation
Technical Setup for Remote Interviews
Most technical interviews happen remotely, making technical preparation crucial.
Hardware and Software Checklist: Test your camera and microphone at least one hour before the interview. Ensure stable internet connection with backup mobile hotspot ready. Charge your laptop fully and keep the charger nearby. Close all unnecessary applications and browser tabs. Disable notifications on your computer and phone. Set up proper lighting with natural light from windows or a desk lamp. Position camera at eye level for better appearance. Use headphones to prevent audio echo. Have a glass of water nearby.
Coding Environment Setup: If you’ll be sharing your screen while coding, prepare your IDE or text editor in advance. Increase font size to at least sixteen pixels for better readability. Use a clean color scheme with good contrast. Create a new workspace with just the files you need. Test screen sharing beforehand to ensure everything displays correctly. Have documentation bookmarks ready if allowed. Keep terminal window accessible for running code.
Communication During Technical Interviews: Think aloud while solving problems so interviewers understand your thought process. Ask clarifying questions before jumping into code. Explain your approach before coding. Mention edge cases you’re considering. If you get stuck, verbalize what you’re thinking and ask for hints. Run through test cases once you finish coding. Be open to feedback and suggestions. Stay calm if something doesn’t work – debugging skills are also evaluated.
In-Person Interview Preparation
Some companies still conduct in-person interviews, requiring additional preparation.
Professional Appearance: Dress appropriately for the company culture – business casual is usually safe for tech interviews. Arrive fifteen to thirty minutes early to account for traffic and to compose yourself. Bring multiple copies of your resume printed on quality paper. Carry a professional folder or portfolio. Bring a notebook and pen for taking notes. Have breath mints but not chewing gum during the interview.
Whiteboard Coding Tips: Practice writing code on paper or whiteboard at home before the interview. Write neatly with clear, legible handwriting. Explain your approach before coding on the whiteboard. Leave space at the top for function signatures and imports. Use proper indentation to show code structure. Step through your code with example inputs. Don’t erase mistakes – strike through and continue. Ask if you can use pseudocode for complex implementations. Test your code by walking through it with sample inputs.
Section E: Salary Negotiation and Offer Evaluation
Researching Fair Compensation
Understanding market rates prevents you from accepting below-market offers or pricing yourself out of opportunities.
Salary Research Resources: Use Glassdoor to see company-specific salary ranges. Check Levels.fyi for tech company compensation data. Review Payscale for location-adjusted salary information. Join relevant LinkedIn groups where people share salary information. Talk to recruiters about market rates for your experience level. Consider your location since salaries vary significantly by region.
Total Compensation Beyond Salary: Evaluate the complete package including base salary, signing bonus, annual performance bonus, equity or stock options, health insurance coverage, retirement benefits and matching, paid time off and holidays, remote work flexibility, professional development budget, and other perks like gym memberships or meals.
Negotiation Strategies: Wait for the employer to name a number first if possible. When asked about salary expectations, give a range based on research with your target number at the lower end. Justify your ask with specific skills, experience, and market data. Negotiate other benefits if salary is fixed. Get everything in writing before accepting. Don’t accept immediately – ask for time to consider. Be professional and collaborative, not adversarial. Express enthusiasm for the role while negotiating.
Evaluating Multiple Offers
When fortunate enough to have multiple offers, evaluate them holistically.
Decision Matrix Approach: Create a spreadsheet comparing offers across dimensions like total compensation, growth opportunities, company culture fit, technology stack and learning, work-life balance, commute or remote flexibility, team and manager quality, company stability and funding, and product or mission alignment. Assign weights to each factor based on your priorities. Score each company on every dimension. Calculate weighted scores to guide your decision objectively.
Section F: Post-Interview Best Practices
Thank You Notes and Follow-Up
Thoughtful follow-up demonstrates professionalism and genuine interest.
Thank You Email Template: Send thank you emails within twenty-four hours of your interview. Address each interviewer individually if you have their contacts. Keep it brief – three to four paragraphs maximum. Express genuine appreciation for their time. Reference specific conversation points to show you were engaged. Reiterate your interest in the role. Mention how your skills align with what you discussed. Close professionally with your contact information.
Following Up on Pending Decisions: If you haven’t heard back within the stated timeline, send a polite follow-up email. Wait at least one week past the expected decision date before following up. Keep the tone professional and understanding. Restate your interest in the position. Ask if they need any additional information from you. Respect their timeline and process.
Handling Rejections Professionally: Thank them for the opportunity and their time. Ask for feedback if they’re willing to share. Express interest in future opportunities with the company. Connect with interviewers on LinkedIn to maintain the relationship. Learn from the experience and move forward positively. Remember that rejections are normal and don’t reflect your worth.
Section G: Continuous Learning Resources
Online Learning Platforms
Continuous learning keeps your skills sharp and current with industry trends.
Comprehensive MERN Courses: Udemy offers affordable courses like “MERN Stack Front to Back” covering complete application building. Coursera provides university-backed courses with certifications. Free Code Camp offers completely free full-stack JavaScript curriculum. YouTube channels like Traversy Media, Net Ninja, and Web Dev Simplified provide free tutorials. Each platform has strengths – choose based on your learning style and budget.
Documentation as Learning Resources: Official documentation is the most authoritative resource. React documentation with interactive examples and hooks guide is excellent for learning. MDN Web Docs provides comprehensive JavaScript reference with examples. Express.js documentation covers all framework features clearly. MongoDB manual includes tutorials and best practices. Node.js documentation explains core modules thoroughly. Reading documentation improves your understanding beyond tutorials.
Blogs and Articles: Follow Dev.to for community-written tutorials and discussions. Read Medium publications like Better Programming and JavaScript in Plain English. Subscribe to CSS-Tricks for frontend techniques. Follow Smashing Magazine for web development best practices. Read official blogs from React, MongoDB, and Node.js teams. Stay updated with weekly newsletters like JavaScript Weekly or Node Weekly.
Community Engagement: Join Stack Overflow to ask and answer questions – teaching reinforces learning. Participate in Reddit communities like r/reactjs, r/node, and r/webdev. Attend local meetups or virtual conferences. Join Discord servers focused on MERN development. Contribute to open-source projects to learn from experienced developers. Follow influential developers on Twitter for insights and trends.
Section H: Common Mistakes to Avoid
Technical Interview Mistakes
Avoiding common pitfalls improves your interview performance significantly.
Jumping to Code Too Quickly: Many candidates start coding before fully understanding the problem. Take time to ask clarifying questions. Discuss your approach before typing. Consider edge cases and constraints. Get interviewer confirmation before proceeding. Five minutes of planning saves fifteen minutes of wrong code.
Not Testing Your Code: Always walk through your code with examples once finished. Test edge cases like empty inputs, single elements, or maximum values. Explain what each test case validates. Fix bugs you discover during testing. Interviewers value thoroughness and debugging skills.
Poor Communication: Silent coding leaves interviewers unsure about your thinking. Explain your thought process continuously. Mention alternatives you’re considering. Ask questions when unclear. Accept hints graciously when offered. Communication skills are equally important as coding skills.
Ignoring Time Complexity: Many candidates solve problems without considering efficiency. Always mention time and space complexity. Optimize solutions when possible. Explain trade-offs between different approaches. Show awareness of scalability concerns even in simple problems.
Memorizing Instead of Understanding: Memorized solutions fail when problems vary slightly. Focus on understanding patterns and principles. Practice explaining why solutions work. Adapt approaches to new scenarios. Interviewers detect and penalize memorization.
Behavioral Interview Mistakes
Soft skills assessment requires equal preparation to technical rounds.
Negative Talk About Previous Employers: Complaining about past companies or colleagues reflects poorly on you. Frame challenges positively as learning experiences. Focus on what you gained from difficult situations. Show maturity and professionalism in how you discuss conflicts.
Vague or Generic Answers: Answers without specific examples lack credibility. Use the STAR method with concrete details. Quantify results whenever possible. Share real experiences not hypothetical scenarios. Specificity demonstrates genuine experience.
Not Preparing Questions: Having no questions for interviewers suggests lack of interest. Prepare five to seven thoughtful questions in advance. Ask about team dynamics, growth opportunities, and challenges. Avoid questions about salary or benefits in early rounds. Good questions show engagement and critical thinking.
Section I: Mock Interview Practice
Finding Mock Interview Partners
Practice with feedback accelerates improvement more than solo preparation.
Peer Practice: Find fellow MERN developers through bootcamp cohorts, online communities, or local meetups. Schedule regular mock interview sessions taking turns as interviewer and candidate. Use actual interview questions from lists or past experiences. Provide honest, constructive feedback to each other. Record sessions to review your performance later.
Professional Mock Interview Services: Platforms like Pramp offer free peer-to-peer practice interviews. Interviewing.io provides anonymous mock interviews with engineers from top companies. Many bootcamps offer alumni mock interview services. Some career coaches specialize in technical interview preparation. These services provide valuable outside perspective on your performance.
Self-Recording Practice: Record yourself answering common questions on video. Watch recordings with a critical eye. Notice filler words, nervous habits, or unclear explanations. Practice until you sound natural and confident. This method works well for behavioural question preparation.
Structured Practice Schedule
Consistent, structured practice yields better results than sporadic cramming.
Weekly Practice Plan: Dedicate specific times for different preparation areas. Monday – solve three Leet Code problems focusing on arrays and strings. Tuesday – practice explaining technical concepts aloud. Wednesday – work on a small MERN project implementing new features. Thursday – review two system design case studies. Friday – practice behavioural questions using STAR method. Weekend – build portfolio projects or contribute to open source. Adjust based on your timeline and weak areas.
Section J: Final Pre-Interview Checklist
One Week Before
Complete these tasks to ensure comprehensive preparation.
Technical Preparation: Review all major MERN stack concepts with focus on your weak areas. Complete at least fifteen coding problems covering common patterns. Review your portfolio projects thoroughly – be ready to discuss every line. Prepare explanations for your technology choices and architecture decisions. Practice drawing system diagrams for your projects. Review common interview questions and prepare answers.
Materials Preparation: Update your resume with latest projects and skills. Print multiple copies if interview is in-person. Prepare a list of references with updated contact information. Organize your portfolio with working demos and clean GitHub repositories. Prepare questions to ask interviewers based on company research. Gather any requested materials like code samples or assignments.
One Day Before
Final preparations ensure you’re at peak performance.
Final Review: Do light review of key concepts without cramming new material. Solve one or two easy problems to build confidence. Review your STAR stories for behavioral questions. Research your interviewers on LinkedIn if names were shared. Prepare your outfit and materials for next day. Get adequate sleep – rest is more valuable than last-minute studying.
Mental Preparation: Visualize the interview going well. Remind yourself of your accomplishments and strengths. Review your motivation for wanting this position. Practice positive self-talk and affirmations. Do light exercise or meditation to reduce anxiety. Avoid alcohol and heavy meals that might affect sleep or morning clarity.
Interview Day Morning
Start the day right to perform your best.
Physical Preparation: Wake up early with time buffer for unexpected issues. Eat a healthy breakfast with protein and complex carbs. Dress professionally and comfortably. Arrive or log in fifteen minutes early. Do breathing exercises if feeling nervous. Review your notes one final time without cramming.
Mental Setup: Remind yourself that interviews are two-way conversations. You’re evaluating them as much as they’re evaluating you. Recall that one interview doesn’t define your worth as a developer. Focus on doing your best and learning from the experience. Enter with confidence, curiosity, and authentic enthusiasm.
Section K: Success Mindset and Long-Term Growth
Developing Interview Resilience
Building mental toughness helps you perform consistently across multiple interviews.
Reframing Rejection: Every rejection is feedback about fit, not about your abilities. Companies reject candidates for many reasons beyond skills – budget changes, internal candidates, or culture fit. Each interview is practice that makes you better for the next one. Successful developers typically face multiple rejections before landing great roles. Learn from each experience and keep improving.
Growth Mindset Approach: View every interview as a learning opportunity regardless of outcome. Identify specific areas for improvement after each interview. Celebrate small wins like explaining a concept clearly or solving a hard problem. Recognize that skills improve with deliberate practice over time. Stay curious and eager to learn rather than proving you know everything.
Building a Sustainable Career
Interview preparation is part of ongoing professional development.
Continuous Skill Development: Technology evolves rapidly requiring constant learning. Dedicate time weekly to learning new tools or deepening existing knowledge. Build side projects that challenge you beyond current comfort zone. Contribute to open source to learn from experienced developers. Attend conferences, workshops, or webinars in your field. Read technical books not just articles for deeper understanding.
Professional Network Building: Connect with developers on LinkedIn and engage with their content. Attend local meetups or virtual events in your city. Join online communities and contribute helpfully. Build genuine relationships not just transactional networking. Share your knowledge through blog posts or presentations. Mentor junior developers as you gain experience.
Final Words of Encouragement
Preparing for MERN stack interviews requires dedication, but you’ve equipped yourself with comprehensive knowledge through this guide. You’ve mastered over two hundred technical concepts, learned effective communication strategies, practiced with targeted prompts, and understand the complete interview process from preparation through negotiation.
Remember these key principles as you proceed: Authenticity wins – be genuinely yourself rather than trying to be perfect. Preparation builds confidence – the work you’ve done shows in how you carry yourself. Failure is feedback – every setback teaches something valuable. Growth is continuous – landing a job is just the beginning of your development journey.
You’re not just preparing for interviews – you’re building a foundation for a successful career as a MERN stack developer. The skills you’ve developed through this preparation extend far beyond interview rooms. You’ve learned to communicate clearly, solve problems systematically, and present yourself professionally. These capabilities will serve you throughout your career.
Walk into each interview with confidence earned through preparation. Trust in your abilities while remaining humble and eager to learn. Show enthusiasm for technology and genuine interest in the companies you interview with. Be kind to yourself throughout this process.
Your dream role is out there waiting for you. With the preparation you’ve completed using this guide, you’re ready to seize it.
Best of luck in your interviews and your exciting career ahead as a MERN stack developer!